Jacdac_Modules
Overview
Jacdac is a plug-and-play hardware and software stack for microcontrollers and their peripherals such as sensors and actuators. Jacdaptors allow Jacdac to integrate with micro:bit, Raspberry Pi, and other ecosystems.
Key Features:
All Jacdac hardware utilizes a universal driver interface. Regardless of manufacturer or device type, users can seamlessly access compatible programming blocks within supported IDEs.
.png)
Reversible cable delivers seamless plug/unplug experience with low-cost PCB edge connector.

Jacdac services provide an abstract view of a device's features, allowing a consistent coding experience and simulation.
Jacdac modules connect via bus-powered daisy-chaining ("hand-in-hand" topology), supporting near-limitless peripheral expansion with automatic device detection and addressing.
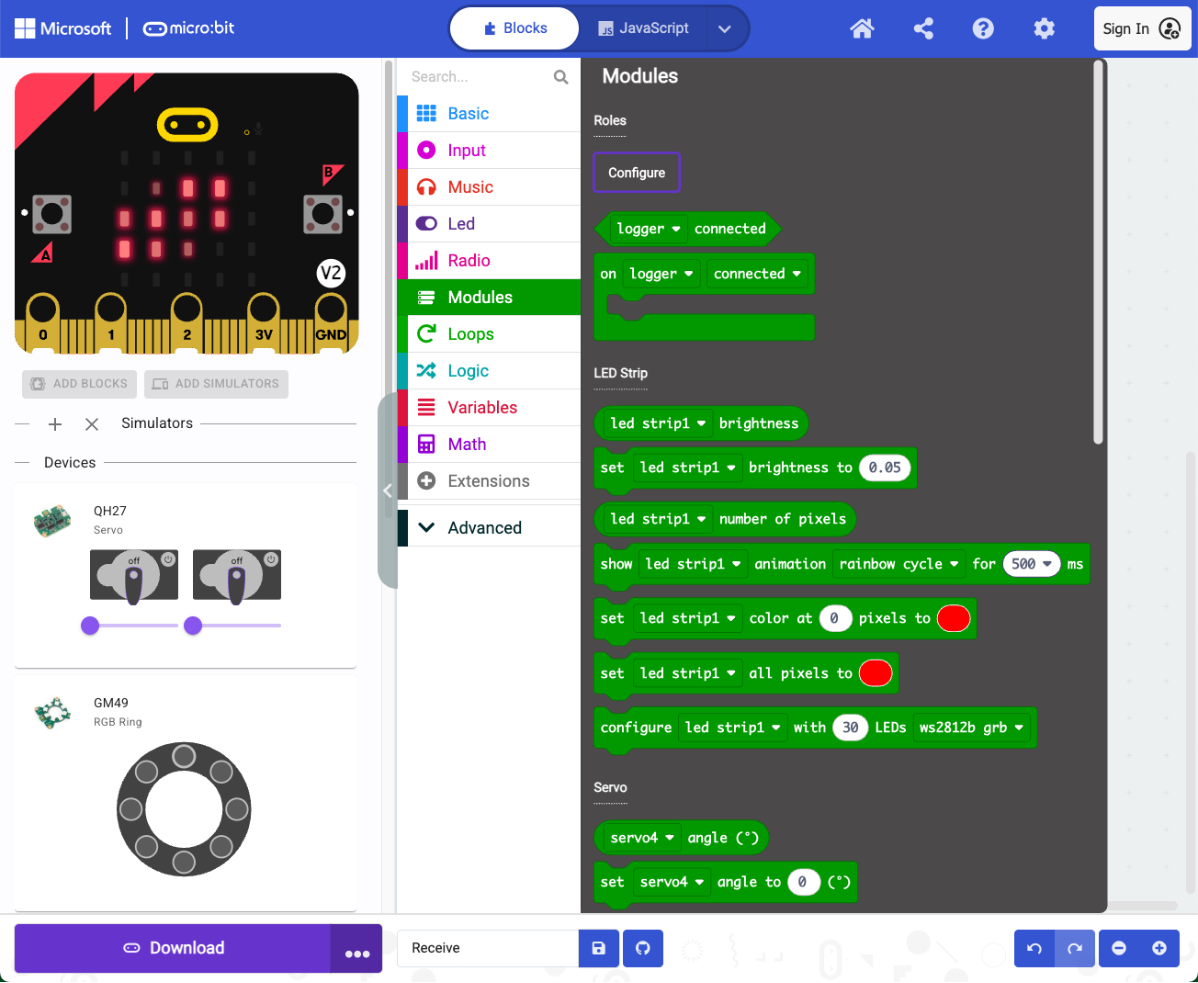
Receive
Jacdac extension in MakeCode
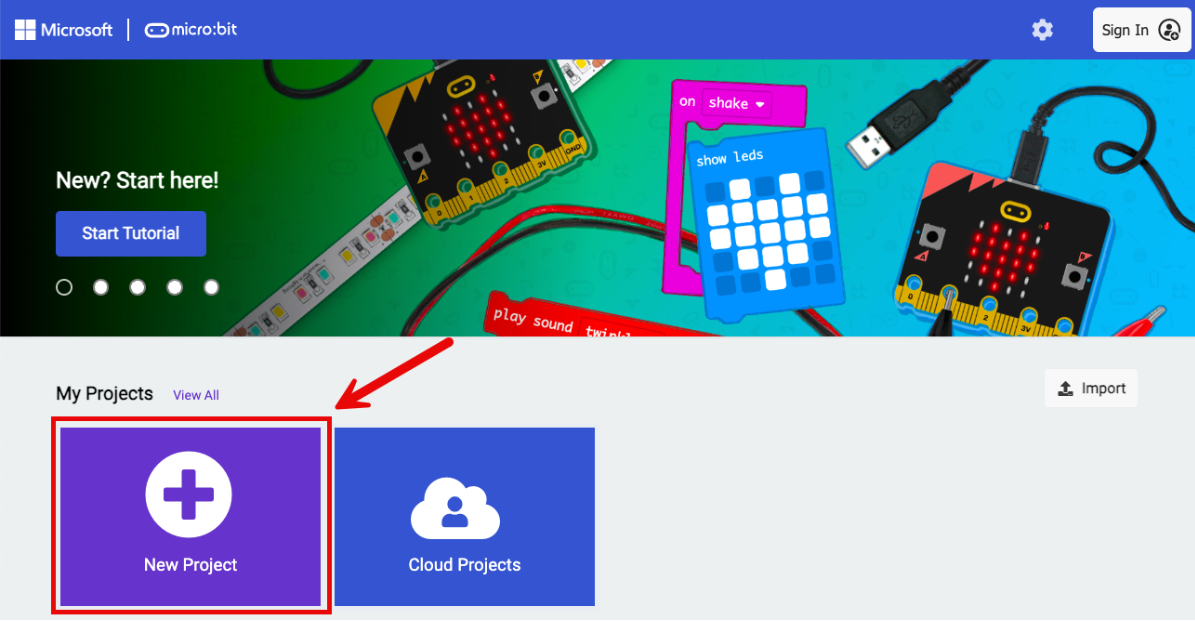
Open MakeCode , click "New Project".
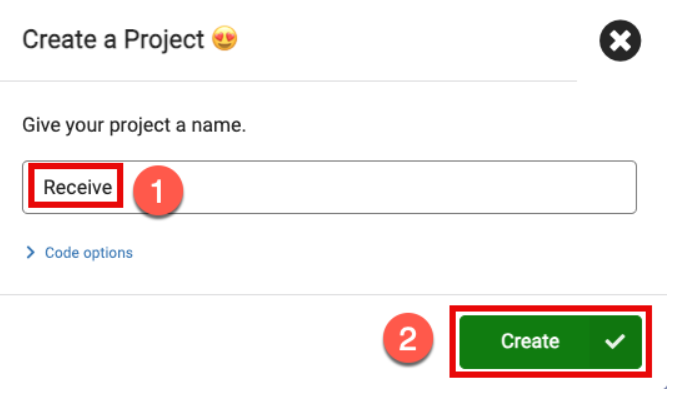
Give your project a name.
Click "Extensions" button

Type "Jacdac" in the search box, then click the "jacdac" extension in the results.
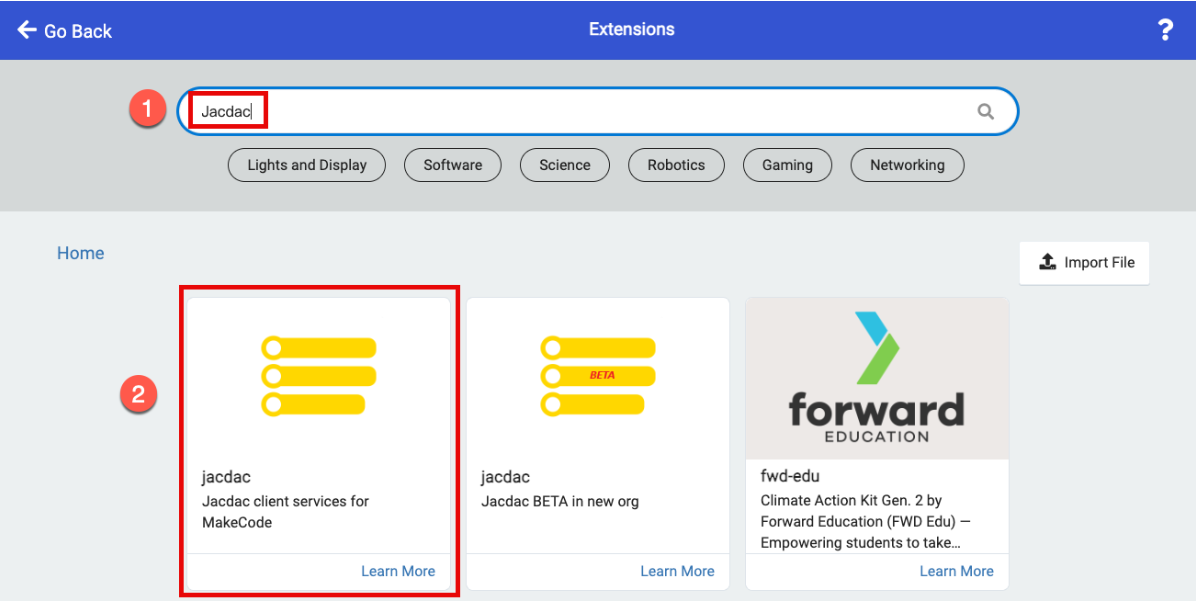
After successful addition, it automatically returns to the coding interface, where you can see corresponding changes in the hardware simulator and block palette.
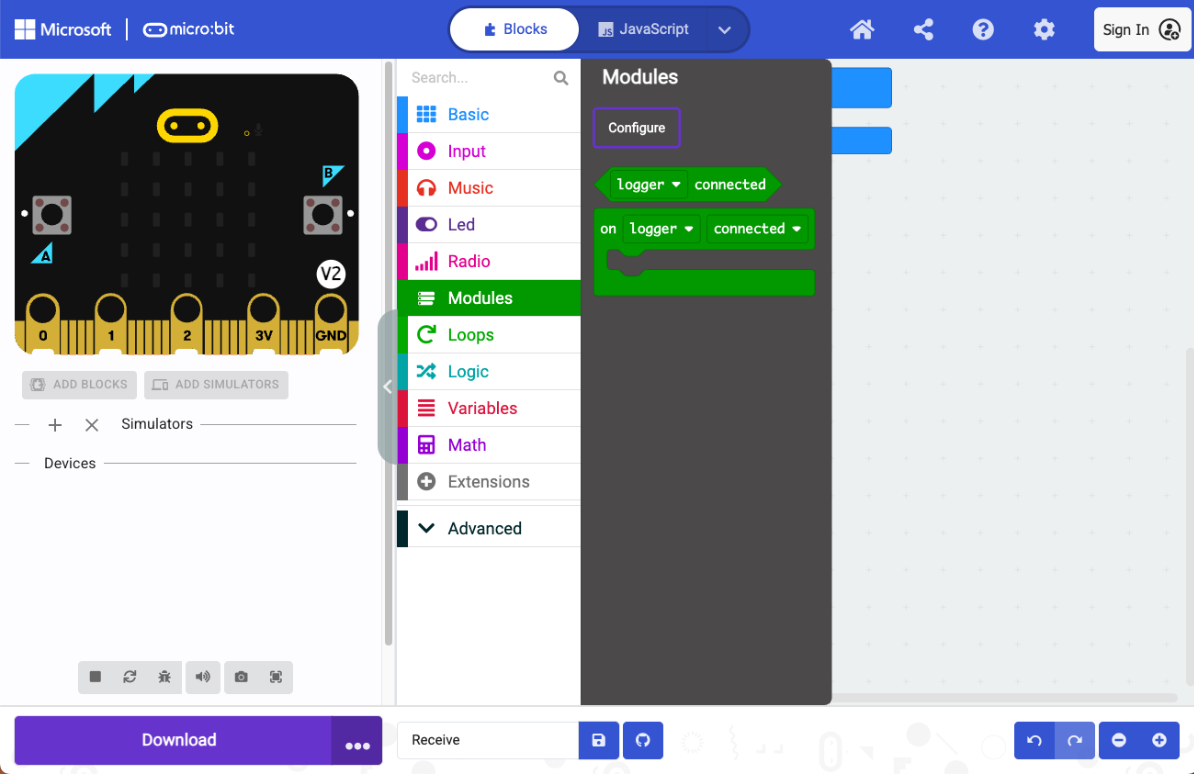
Connecting to micro:bit
If using Jacdac modules with your micro:bit for the first time, we recommend first downloading a blank program with the Jacdac extension to your micro:bit. This allows real-time detection of connected Jacdac devices and enables viewing sensor values/controlling modules via the simulator
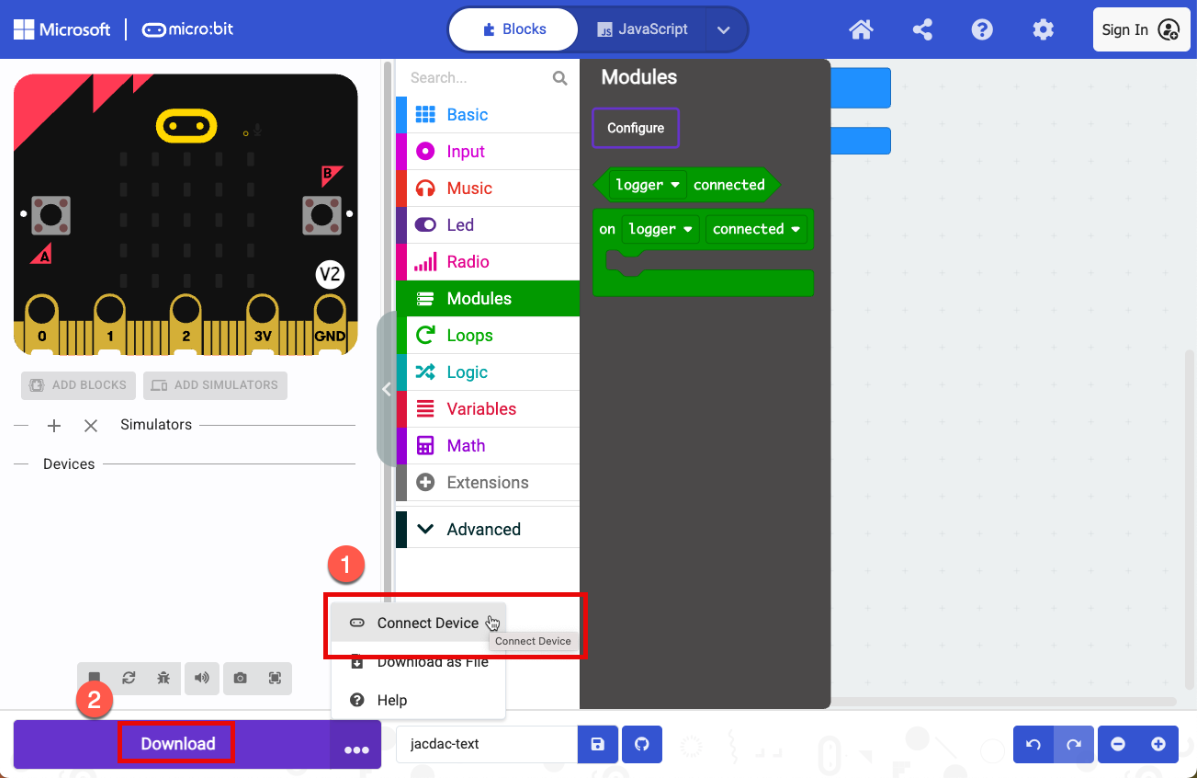
Click "Connect Device", follow the prompts to complete micro:bit connection. Once done, click the adjacent "Download" to flash the blank program (with Jacdac extension) to the micro:bit.
After downloading, you'll see the corresponding Jacdac module in the hardware simulator. If you unplug or connect a Jacdac module, the simulator will automatically remove or add it accordingly.
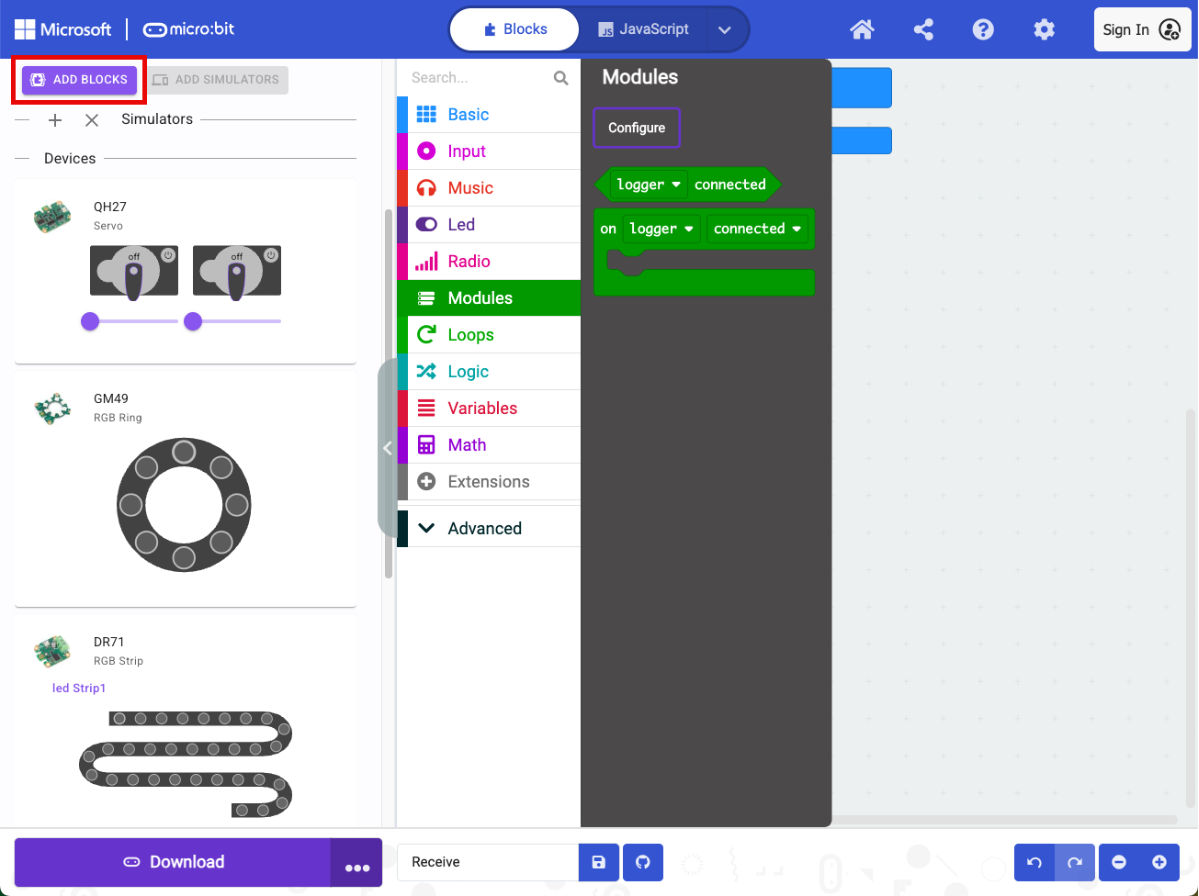
While the Jacdac module appears in the simulator and allows viewing/control, its corresponding blocks won't yet appear in the toolbox. Click "Add Blocks" in the simulator to import the module's blocks into the toolbox.
Jacdac coding
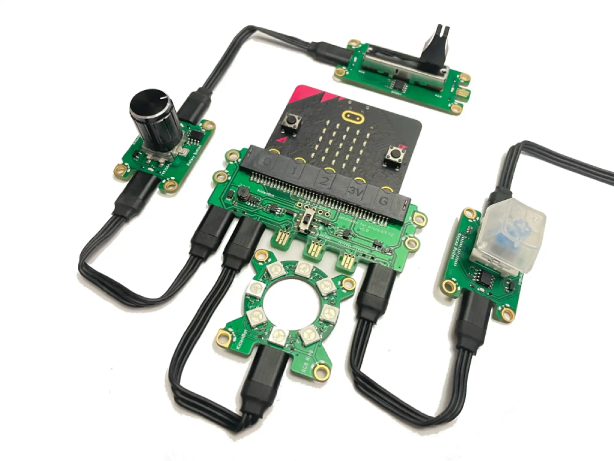
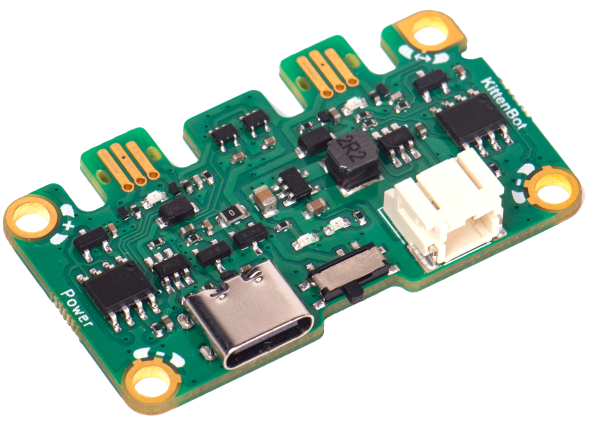
Jacdaptor
The Jacdaptor for the micro:bit V2 allows Jacdac modules to be connected to the micro:bit and coded using MakeCode.The power switch has two options: "Jacdac" and "micro:bit".

For micro:bit-powered projects (typically during debugging): Slide the switch downward to the "Jacdac" position → micro:bit powers the Jacdac system.
For external power modules (standalone operation without PC): Slide the switch upward to the "micro:bit" position → Jacdac powers the micro:bit.
Jacdac-Power
Drive your high-demand JACDAC components with confidence, courtesy of the Power module. Integrated overcurrent protection guarantees a smooth power delivery up to a robust 1A.
Powering Your Project:
1.Connect any Jacdaptor port to the Jacdac Cable
2.Plug in a Type-C cable or battery pack
3.Flip the switch to "ON" position
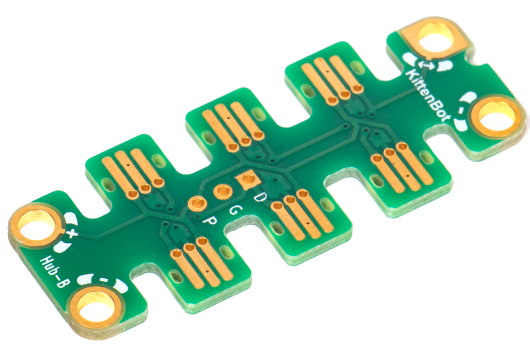
Jacdac-Hub
Integrate modules with finesse using Hub, a comprehensive passthrough hub sporting six versatile connectors.Connect all Jacdac modules to the Jacdac-Hub using Jacdac Cables, then link the Jacdac-Hub to the Jacdaptor.
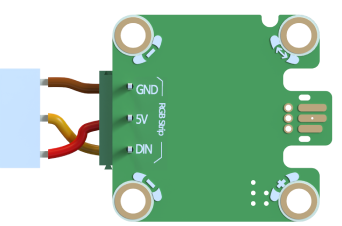
Jacdac-RGB Strip
Illuminate creative endeavors with the RGB Strip v1.0, optimized for WS2812 LED arrays. For expansive LED installations, supplemental power provisioning ensures flawless operation.
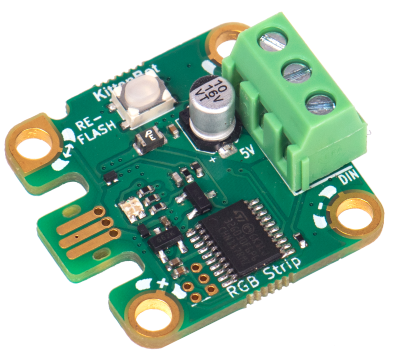
Please use a flathead screwdriver to insert the light strip's wires into the terminal block and tighten them securely, ensuring correct wire alignment (brown - GND, red - 5V, yellow - DIN)
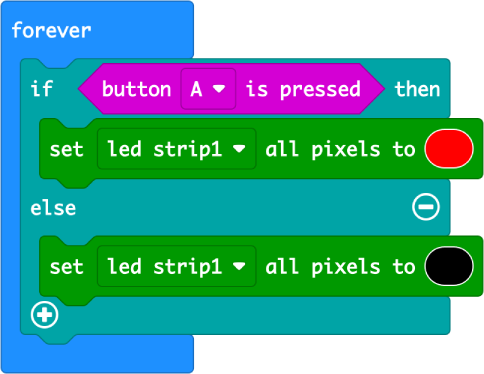
Sample Code: Control LED Strip On/Off with a Button.
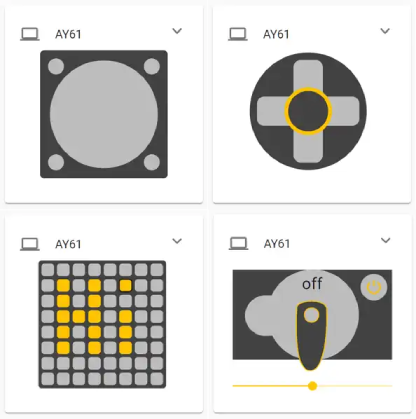
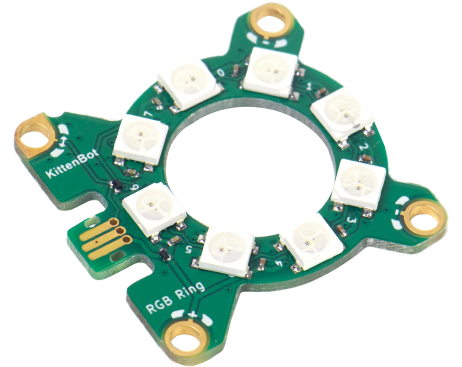
Jacdac-RGB Ring
Add gorgeous color to your creations with 8 ultra-bright RGB LEDs.
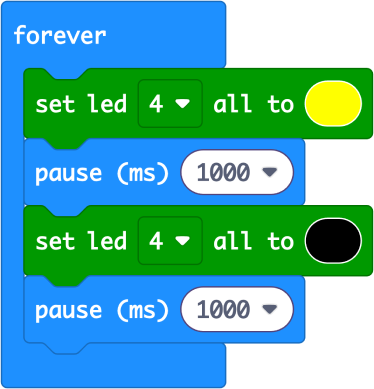
Sample Code: Make the LED ring blink at 1-second intervals.
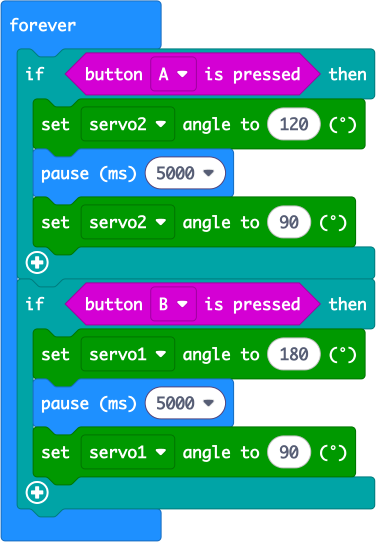
Jacdac-Servo
Harness the power of analog servos with the Servo v1.0 module. Dual output channels and flexible current configurations cater to a myriad of applications.
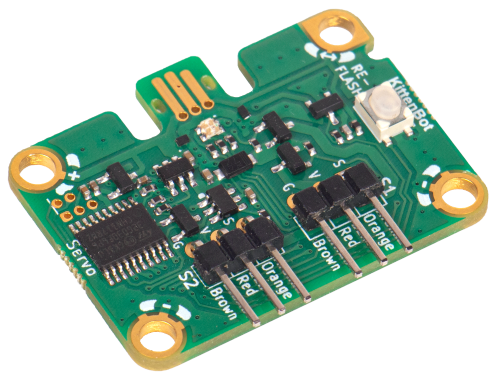
Sample Code: Use Button A to control Servo 2 and Button B to control Servo 1.
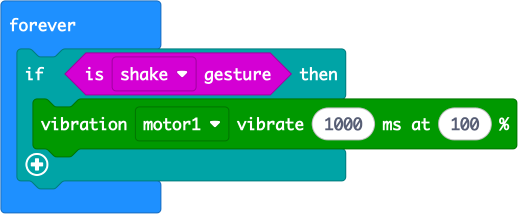
Jacdac-Haptic Output
Embed tactile feedback into your devices with the Haptic Output v1.0 module, a sophisticated vibration motor module.
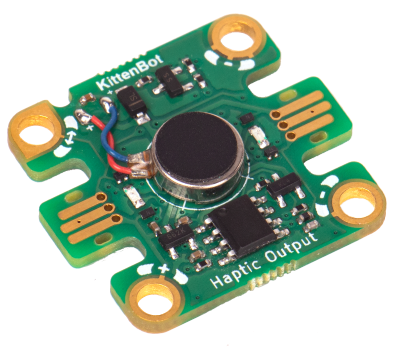
Sample Code: If the micro:bit detects shaking, the Haptic Output will vibrate at 100% power for 10,000 ms.
Program
- Set radio group after power-on (must match wand's group);
- Press Button A to initialize: RGB strip, LED ring, servos,Haptic Output;
- Execute corresponding effects based on detected actions | Action | Component | Effect | Duration | Demo | | --------- | ------------- | ------------------ | -------- | ------------------ | | up | RGB Strip | Red ON→OFF | 5s | Burn the fireplace | | down | RGB Ring | Yellow ON→OFF | - | Light the lamp | | left | Servo 1 | Rotate 30° → Reset | - | Repair the vase | | right | Servo 2 | Rotate 90° → Reset | - | Open the door | | lightning | Haptic Output | Vibrate → Stop | - | Shake the item |
