Arcade Programming
Introduction
Last Updated: March 29, 2024
Quick Start
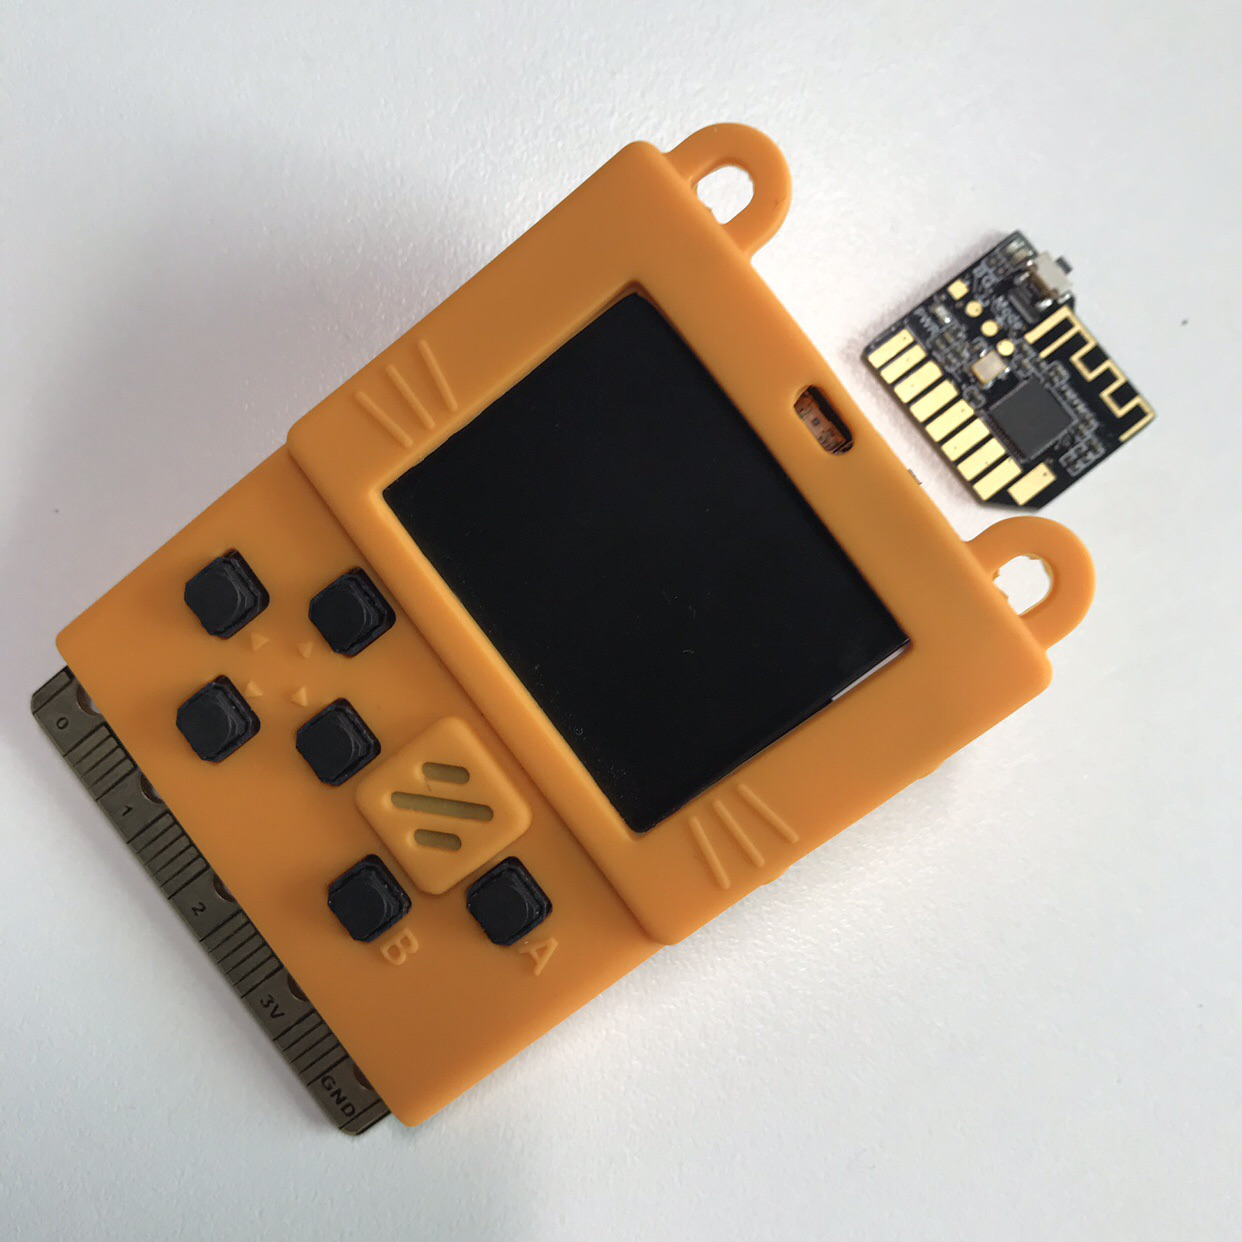
Hardware Preparation
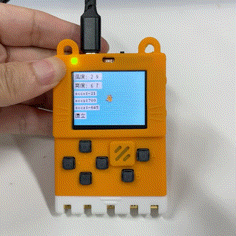
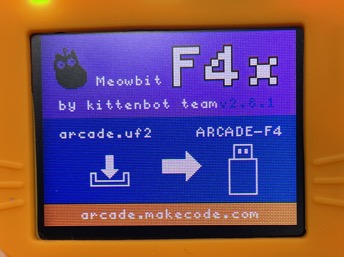
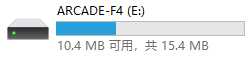
Connect your computer with a USB cable. If your Meowbit is in the Arcade mode firmware, press the Reset button on the right side (as shown in the picture below), and a new drive named ARCADE-F4 will appear on your computer. If the ARCADE-F4 drive does not appear on your computer, you need to check if the motherboard is abnormal.
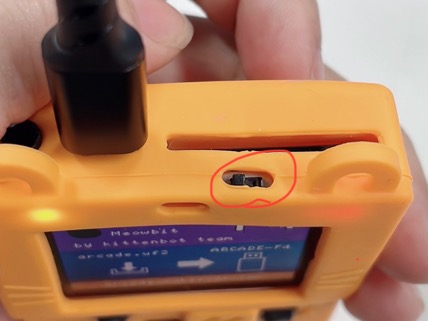
Make sure the switch is turned to the left
Demo Example
- Enter the Arcade game development platform address: https://arcade.makecode.com/
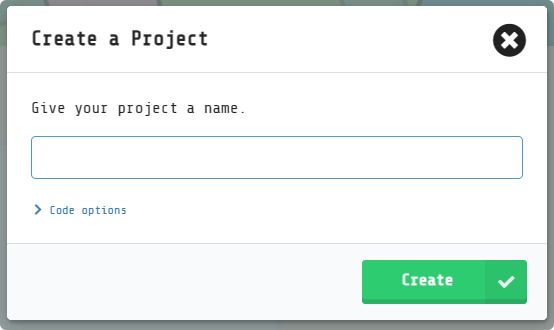
Create a project
Coding
Choose the program you want
Complete a simple program to control the character's movement
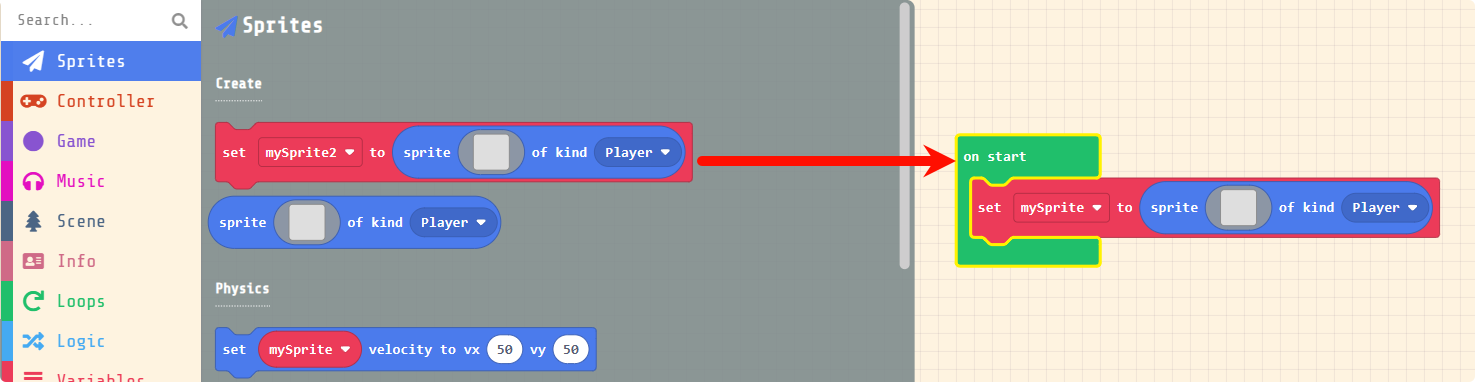
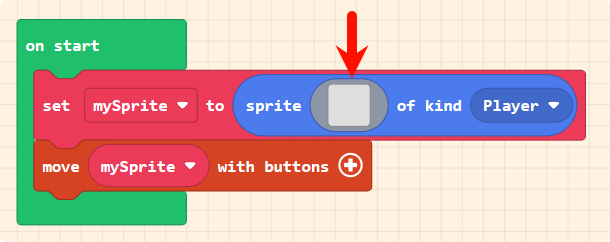
Select the Sprite
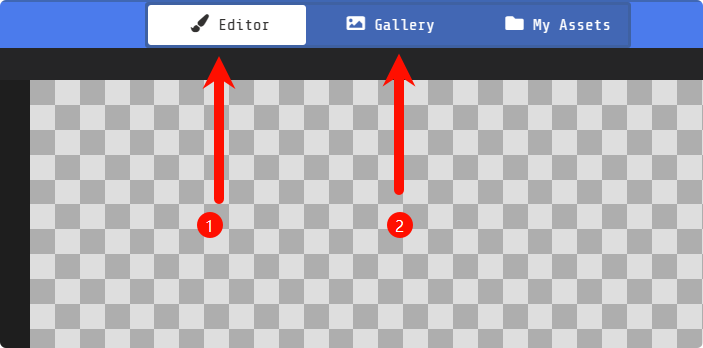
Select the sprite image
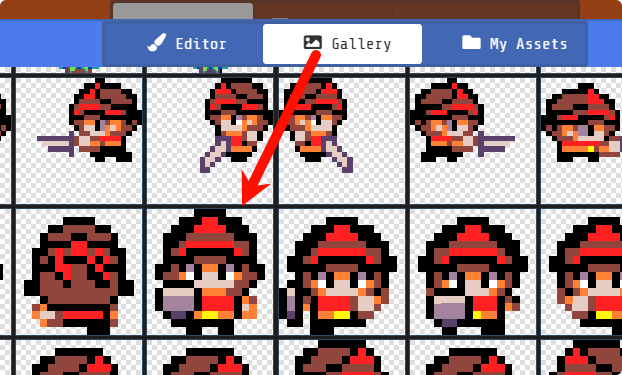
You can choose whether to draw the sprite manually or use the game sprite library
Here, a ready-made sprite is used
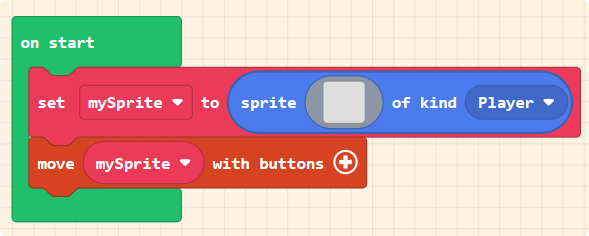
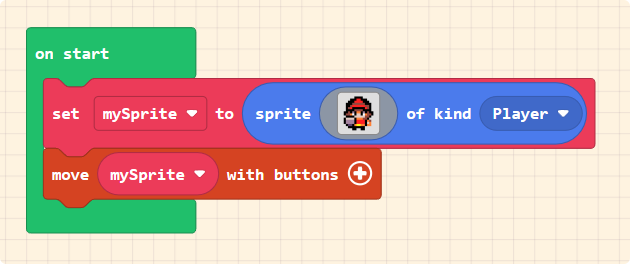
Click Finish

The program is now written
Downloading Programs to the Hardware
Click on Download in the bottom left corner.
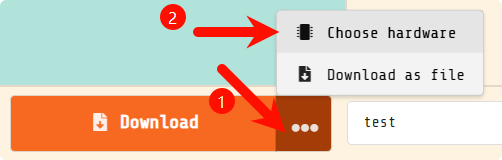
Select the Meowbit hardware.

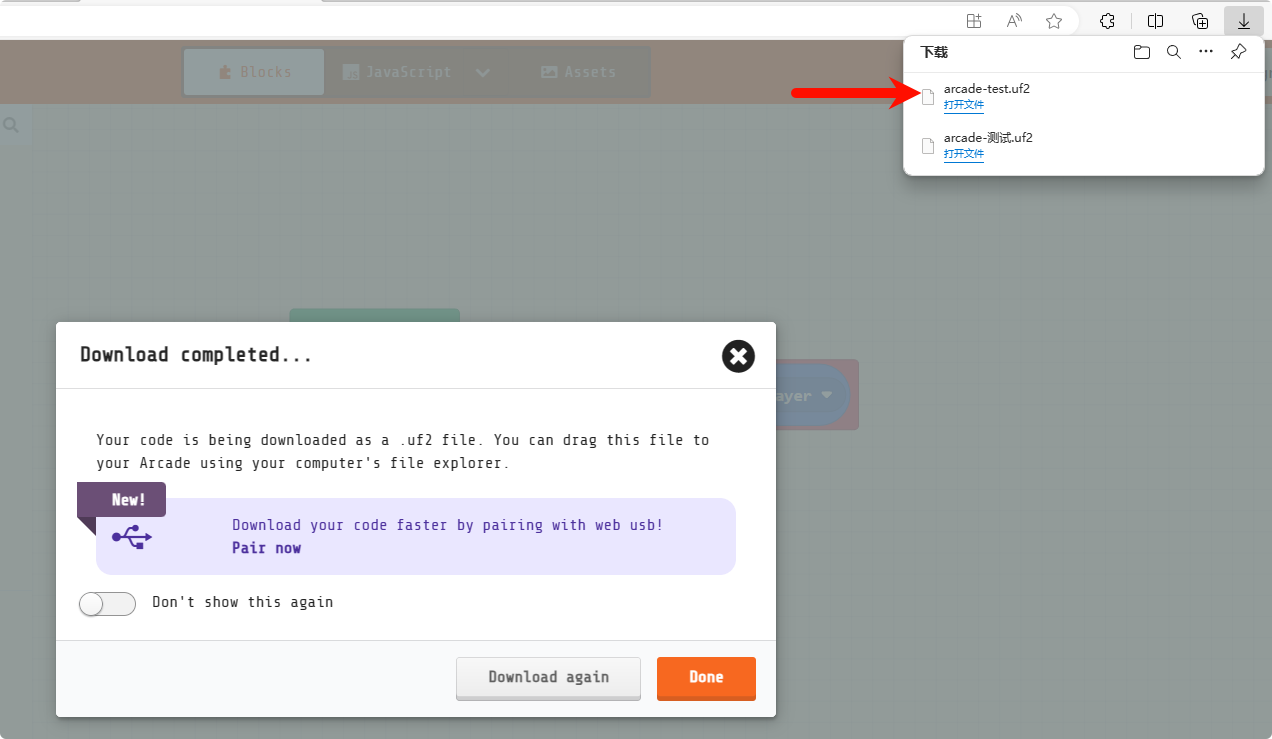
You will obtain a file in the .uf2 format, which you can then drag to the ARCADE-F4 drive.
 danger
This drive is not a real storage space, but rather a simulation to facilitate program downloads, so files cannot be extracted from it.
Copy or move the .uf2 file downloaded from the browser to this drive.
The result should look something like this:
Programming Platforms Introduction
Arcade game programming platform address: https://arcade.makecode.com/
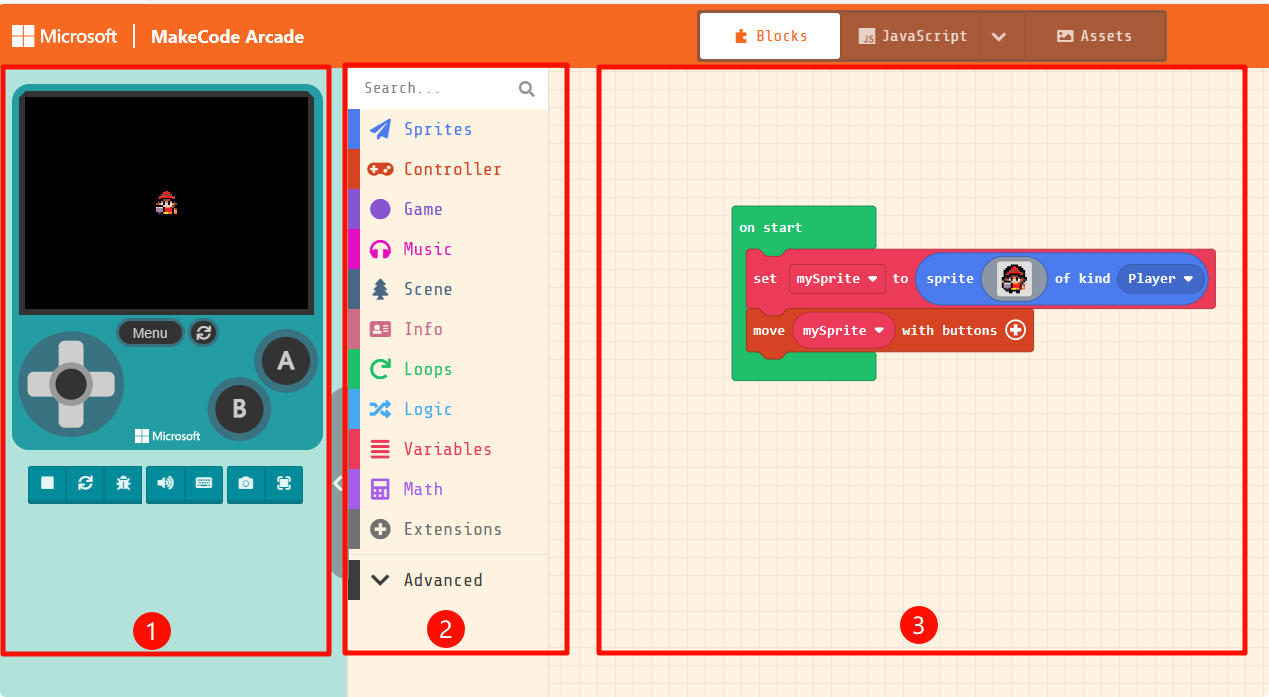
Interface Introduction
Number 1: Click on part number 1 to enter the project name and start programming a project.
Number 2: The following section includes simple tutorials provided by the platform and game works shared by the community. Newbies can learn a little.

For beginners, it can be roughly divided into 3 parts:
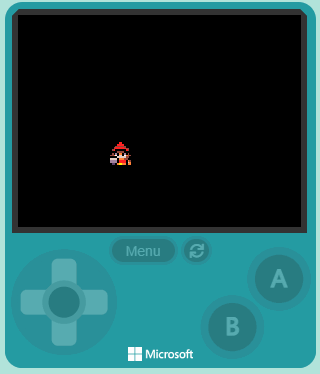
- Online simulator: simulate the running effect in real time according to the logic of the code.
- Programming block bar: we drag and drop programming code from here to program.
- Code editing area: after we drag the code from the block bar, we splice it here to complete the image, interface and logic construction of the game.
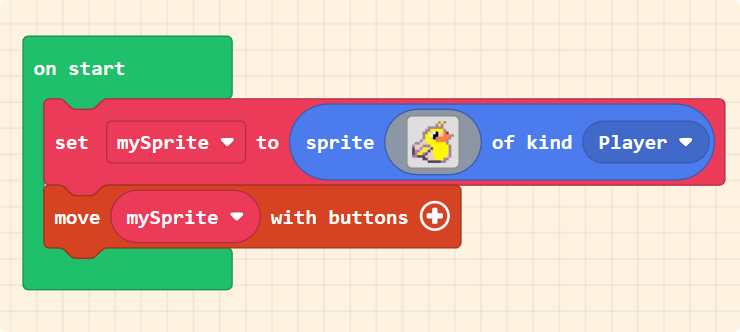
Game Prototype Design
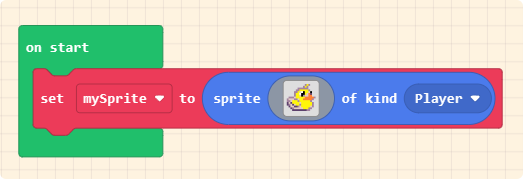
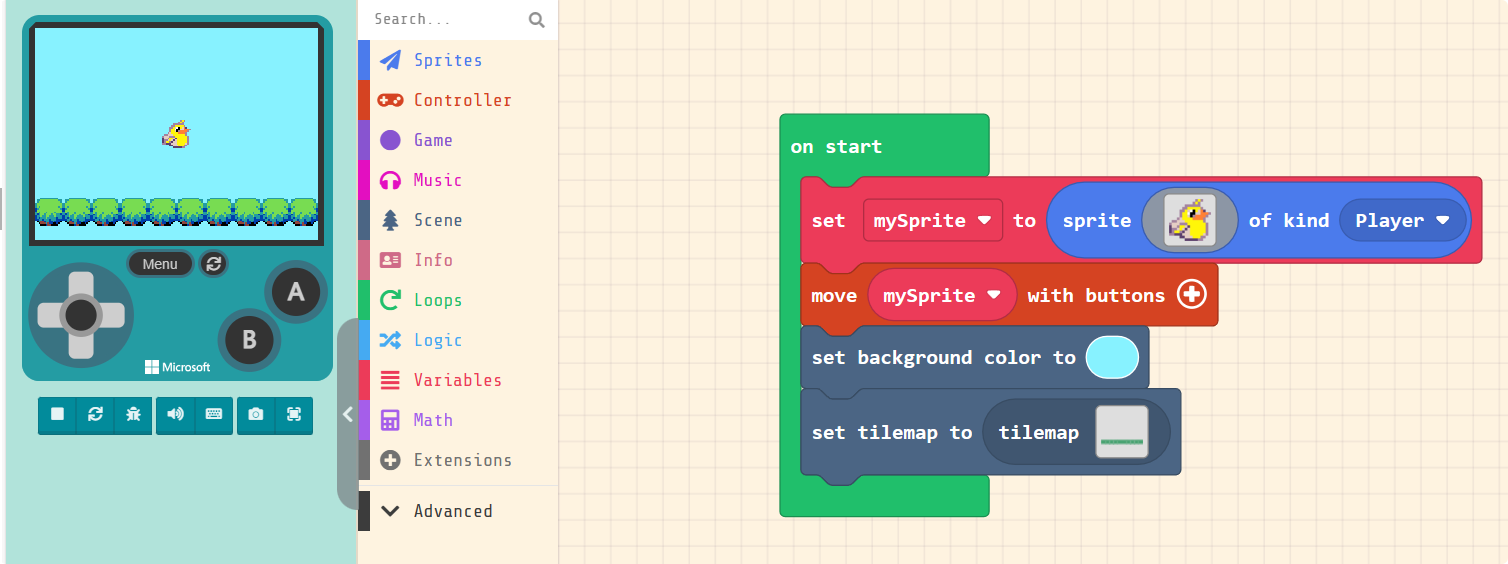
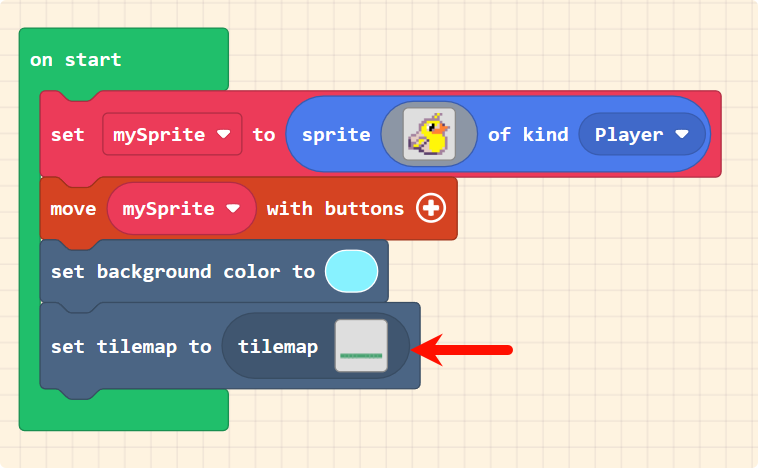
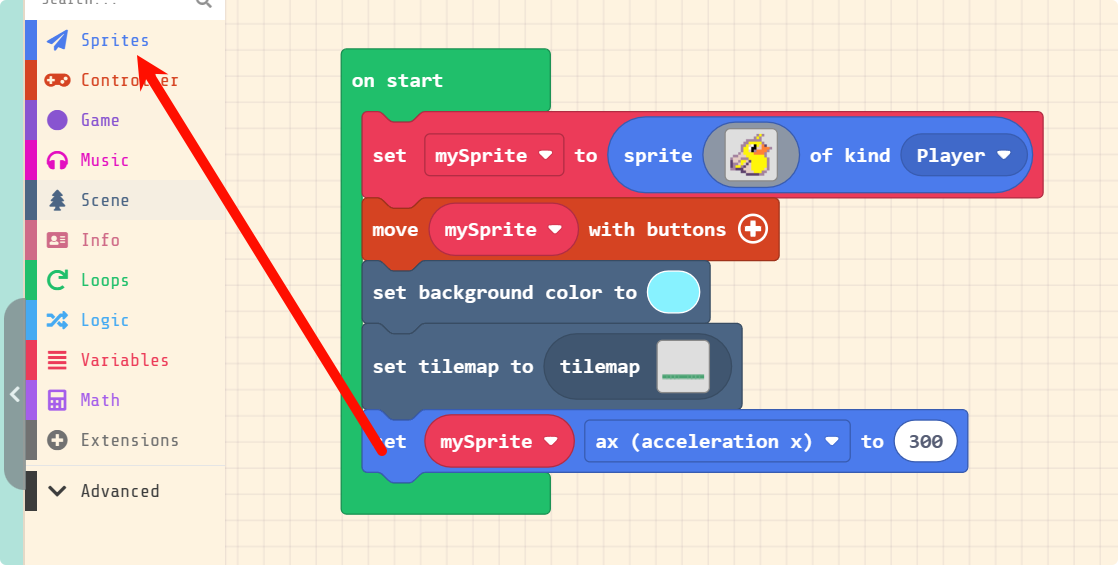
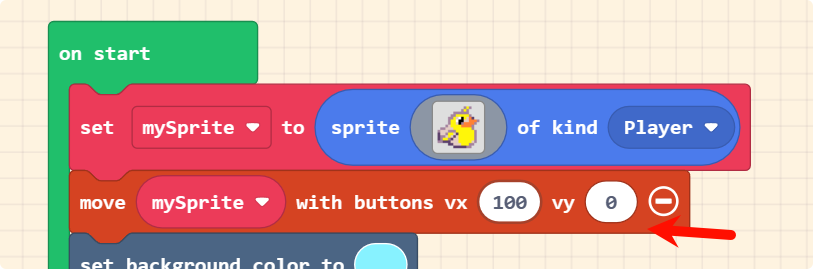
Select or design a character image. Use this building block to create a character and put it under the
**when turned on**execution building block. In the gallery, we can select a built-in character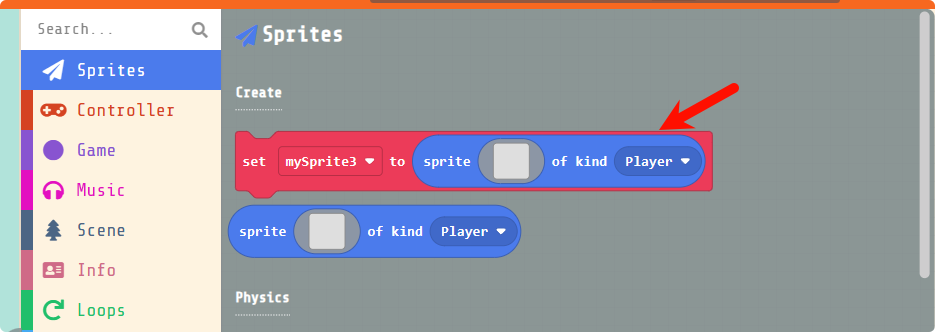
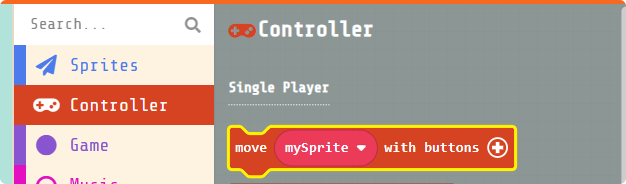
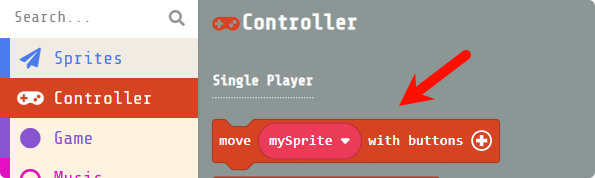
Associate the character with the keyboard (also the buttons on the meow bit). At this time, you can try to use the keyboard to control the movement of the sprite in the simulator
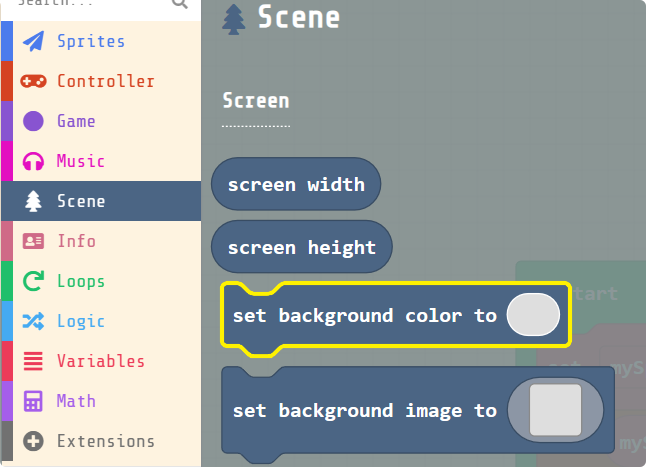
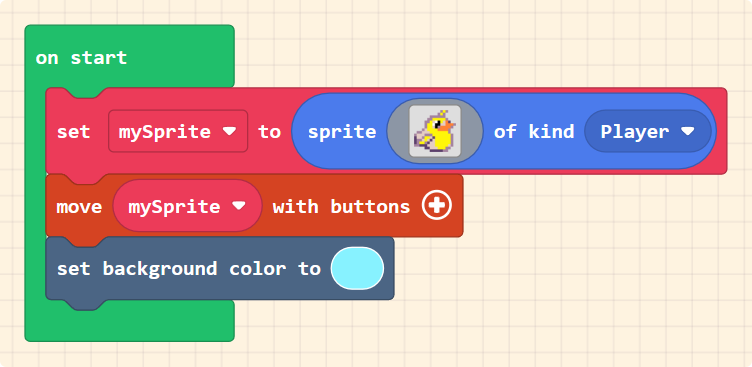
Add a background to the game, change only one color for the time being, and brighten the scene
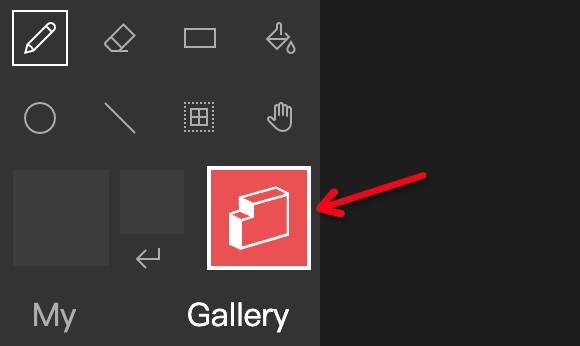
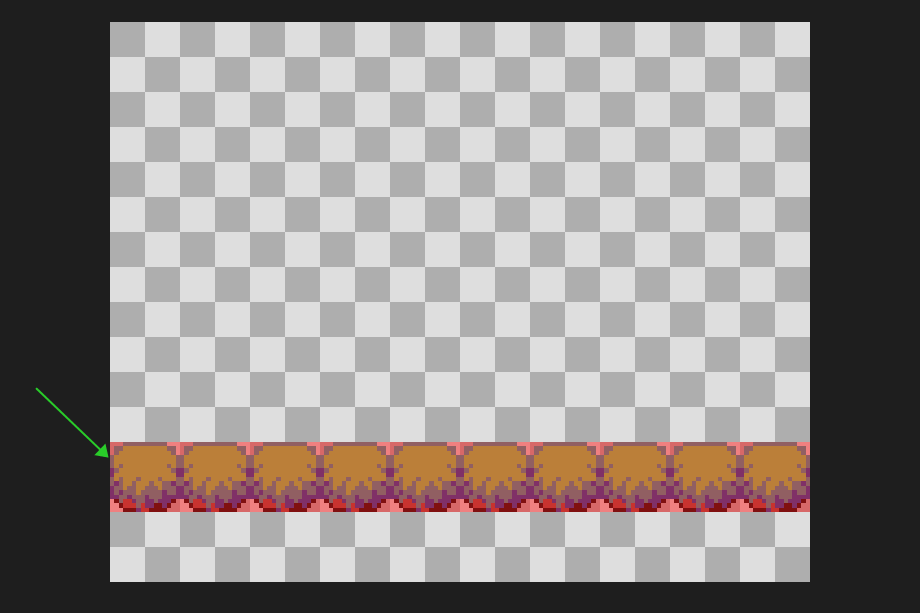
Add a map to the game. With the limitation of the map, it really looks like a game scene. Click on the map setting interface, and first change the parameters. Change the original 16:16 to 10:8.
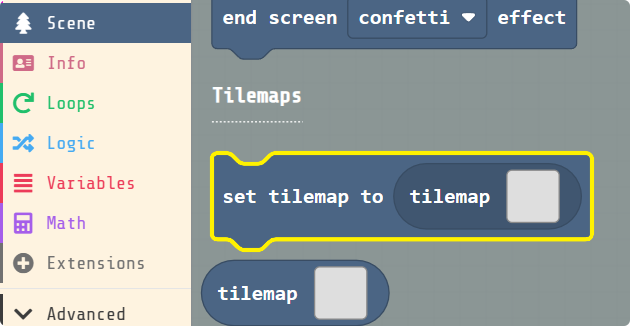
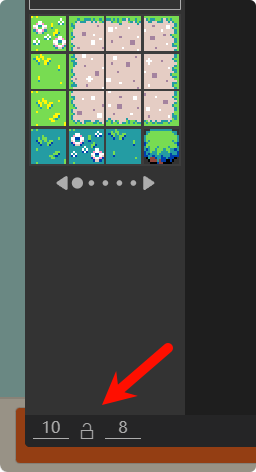
Select a brick you like and draw it with the mouse in the area on the right
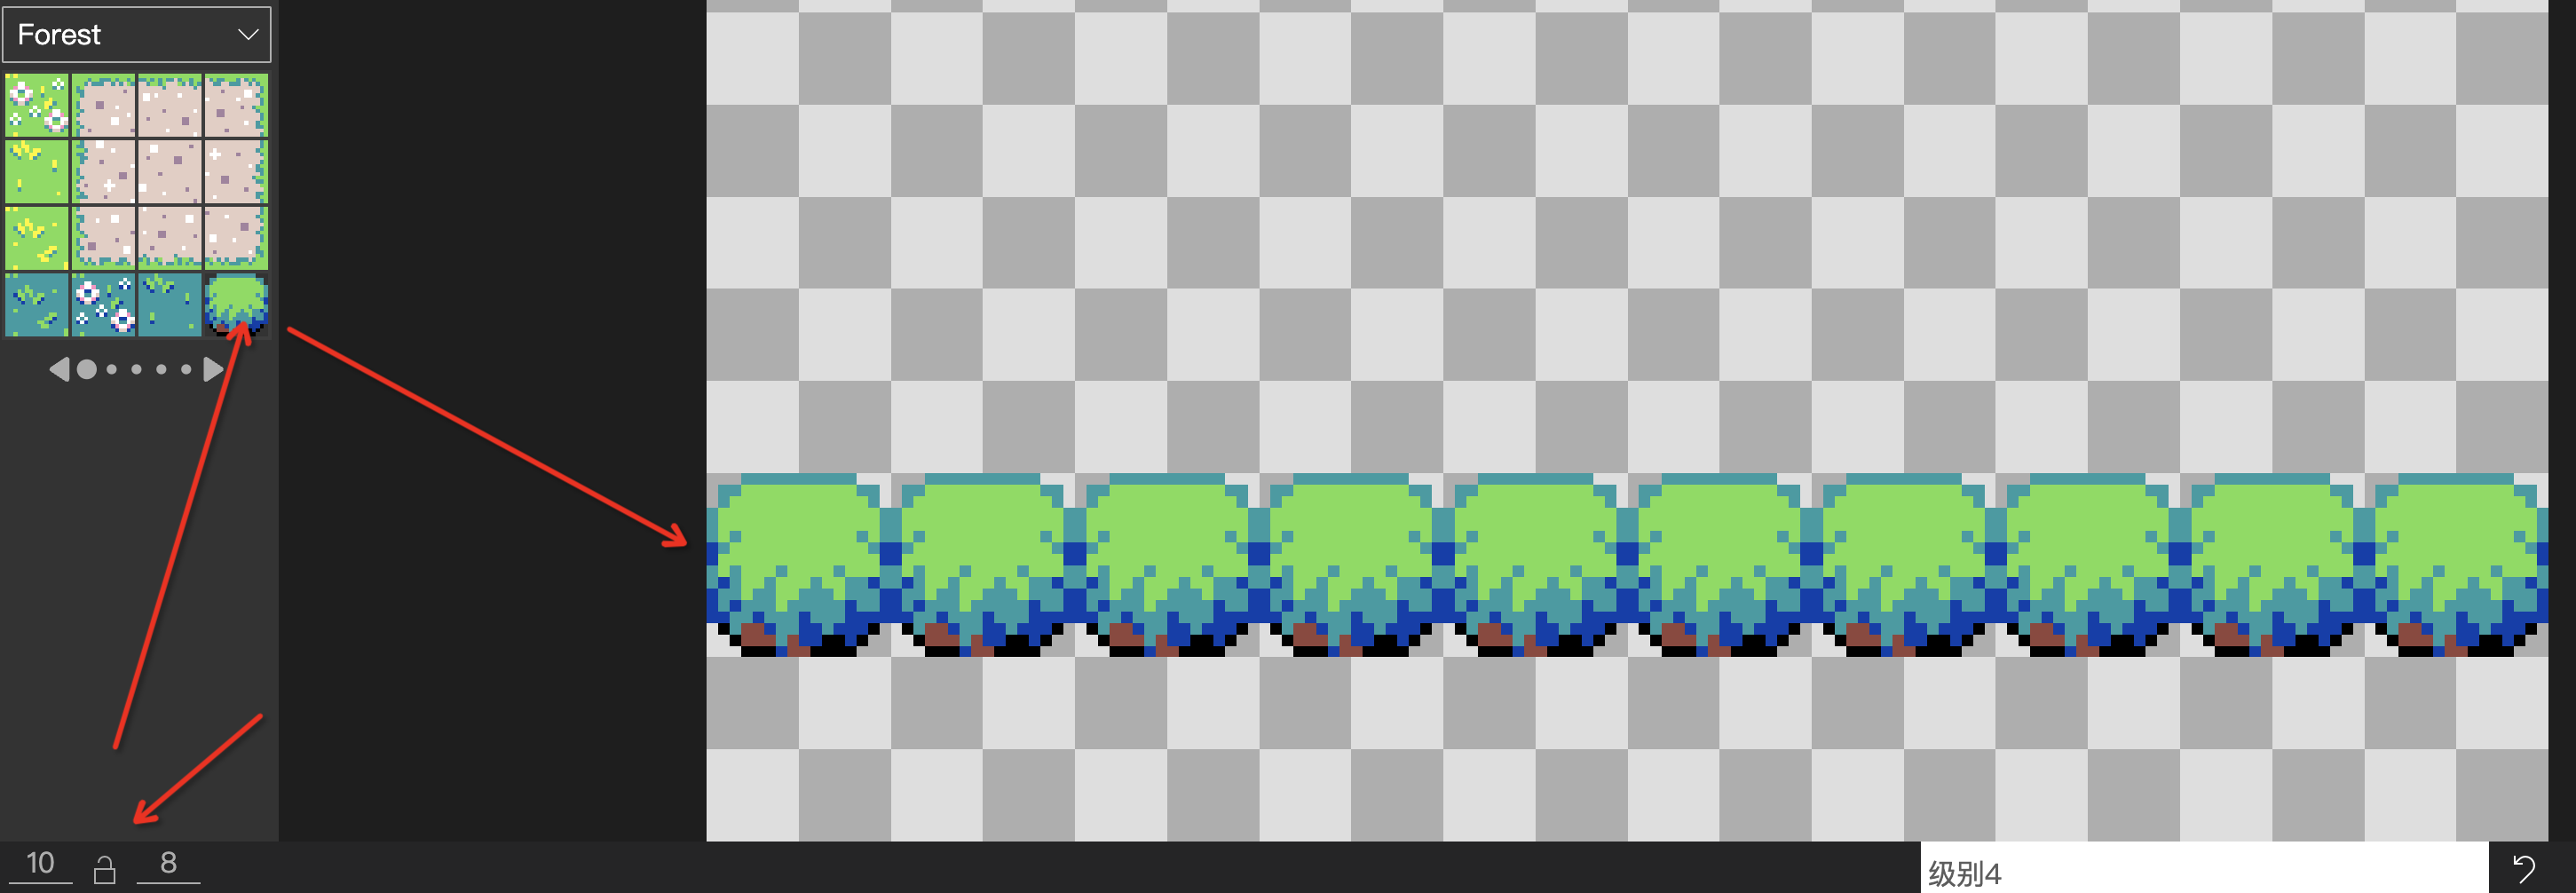
After building the following program, the simulator effect on the left is shown in the figure
Game Interaction
The above steps have completed the simplest game prototype design, including roles, scenes, background colors. Next, we continue to give it life. The so-called life of the game is to be able to experience the feeling of interaction in the game. Let's take the simple interaction of the little bird hitting the tree and 'chirping' as an example.
The interaction is carried out all the time, whether in the game or in life. Therefore, the building block
when the game updatesis used here to indicate that the content in this building block will be refreshed and executed at a subtle speed during the entire game running process.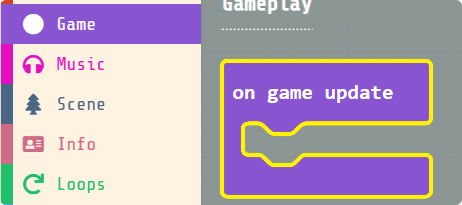
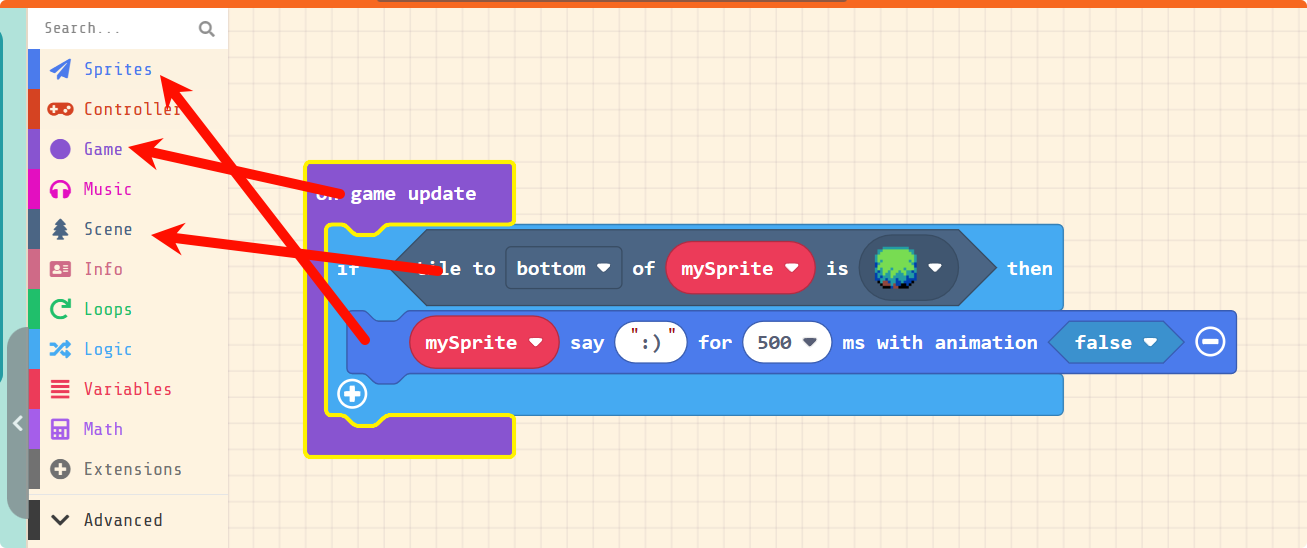
The basis of interaction is judgment and execution. In terms of the logic that the bird will chirp when it hits the tree,
whether it hits the treeis a judgment, andchirpingafter hitting the tree is the execution.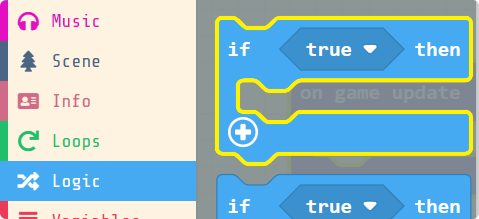
On the basis of the existing program, add the following building block program. After running in the simulator, you can see that the little bird will show :) when it hits the tree.
Add realistic meaning, basic physical laws are necessary. In order to prevent objects from passing through each other, add the property of
wallto the map scene.
- Return to the editing interface of the tile map, select the wall attribute
- Smear on the tile that needs to be turned into a wall, and the tile that turns red will be upgraded to a role that cannot be passed through
Physical Properties
The more real something is, the more likely it is to give people a stronger sense of empathy. Gravity exists in the environment in which we live is the most real, let's not talk about complex knowledge points, just focus on realizing it and see
- The simulated scene is the sky, the bird is in a free fall under the condition of vertical downward gravity acceleration, the normal acceleration of free fall is about 1 g (about 9.8 m/s²), but because it is in pixels on the screen (1 pixel mapping 1 Meter), it looks too slow, so try to expand it by about 30 times
 info
infoYou can see that the bird is falling from the beginning, which already has the feeling of free fall of gravity
- Birds need to flap their wings to avoid hitting trees and fly updanger
After all, we haven't tested the instantaneous vertical velocity of birds flapping their wings, so we simulate it with the vertical velocity of human jumping.
- According to the law of conservation of mechanical energy: 1/2m(weight)v²(square of take-off velocity)=m(mass)g(acceleration of gravity=9.8)h(height)
- Under normal conditions, people can jump vertically about 0.5 meters from the ground
Therefore, the instantaneous velocity v can be obtained as about 3m/s
:::
According to the condition of expanding by 30 times, this v is also expanded by 30 times to 90. Press key A to let the bird flap its wings and fly once
<br />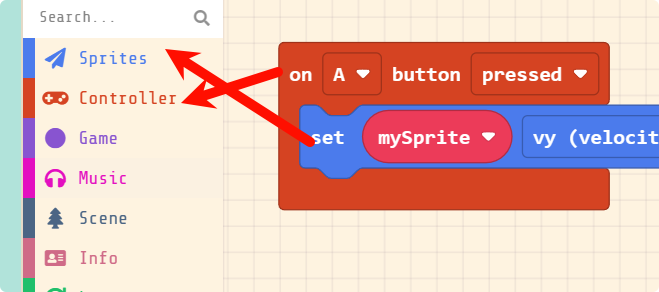
- Since the bird has been affected by the vertical gravity, we should not use the button to interfere with the vertical coordinate of the bird at this time, so now change the y-axis velocity in the previous key association to 0
Finish the program
🏳🌈 Go to the project: https://makecode.com/_LdFRbMU08Jgt
Videos
- Kitty has carefully prepared 17 micro-lessons for everyone, which can help you get started quickly
Supporting books (need to purchase separately)
If the above do not meet your needs or you prefer paper books, you can purchase supporting books on Dangdang http://product.dangdang.com/29240752.html
Onboard Sensor Use
Click on the expansion and choose the "controller" option
2 LEDs, photosensitive sensor, temperature sensor, gyroscope
| numer | Building Block | Description |
|---|---|---|
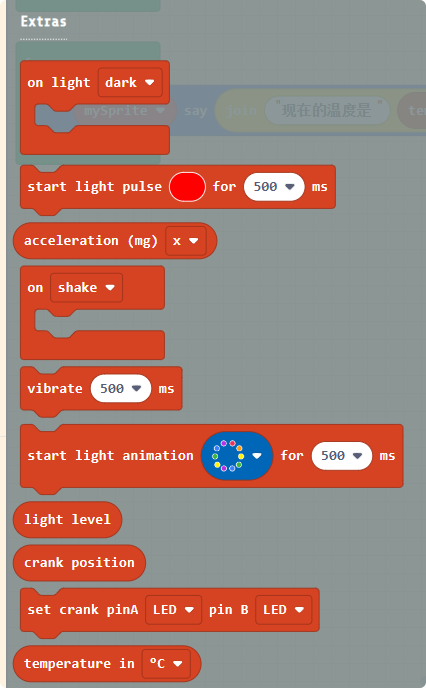
| 1 | 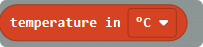 | Onboard temperature measurement |
| 2 |  | Acceleration in the three axial directions of the onboard gyroscope |
| 3 | 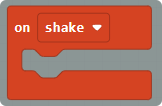 | Gyroscope event trigger |
| 4 |  | Brightness change event |
| 5 |  | Measurement value of the onboard brightness sensor |
Light Sensor Example
Intro: Create a sprite that repeatedly says the current light level.
Code:
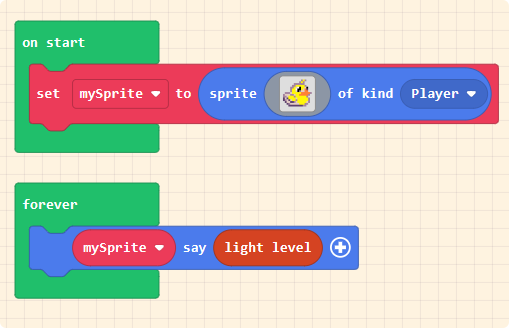
Open in Playground: https://makecode.com/_EkYhVPMAWT6A Behavior: You should see the light level change when you cover the light sensor with your hand.

Temperature Example
Introduction: Create a sprite and let it repeat to display the current temperature.
Program:
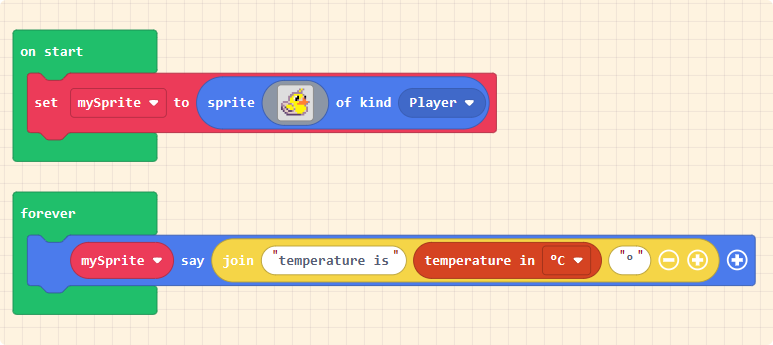
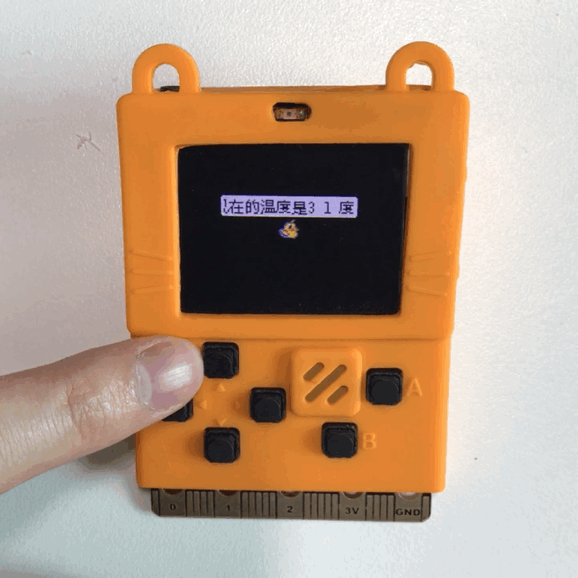
You can open the program directly: https://makecode.com/_iLmVTKa89WrJ Phenomenon: You can see the value slowly rising when your hand touches the thermistor (the measured temperature is slightly higher than the room temperature because there is heat on the PCB circuit board)
Gyroscope Example
Introduction: Create a sprite, tilt the gyroscope left and right, and tilt it up and down to control the movement of the character (Microsoft platform has a bug for the time being, and this example does not get the correct result.)
Program:
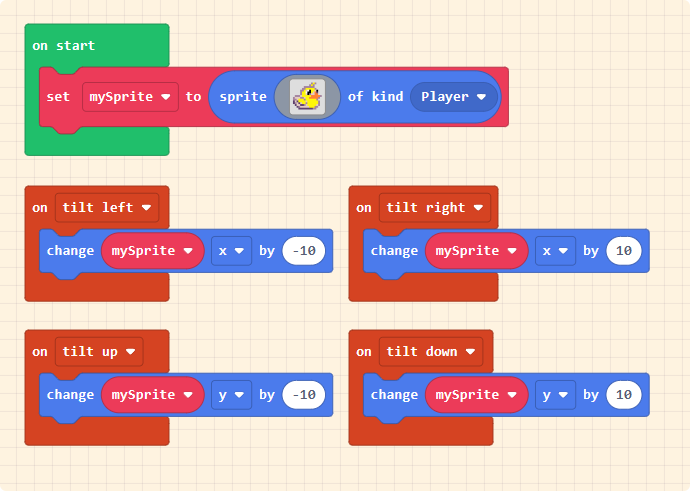
You can open it directly as a program: https://makecode.com/_6e0AYcLCcexs Phenomenon: You can shake the micro:bit and see the character move with the tilt of the micro:bit
Robotbit Usage
Loading the Plugin
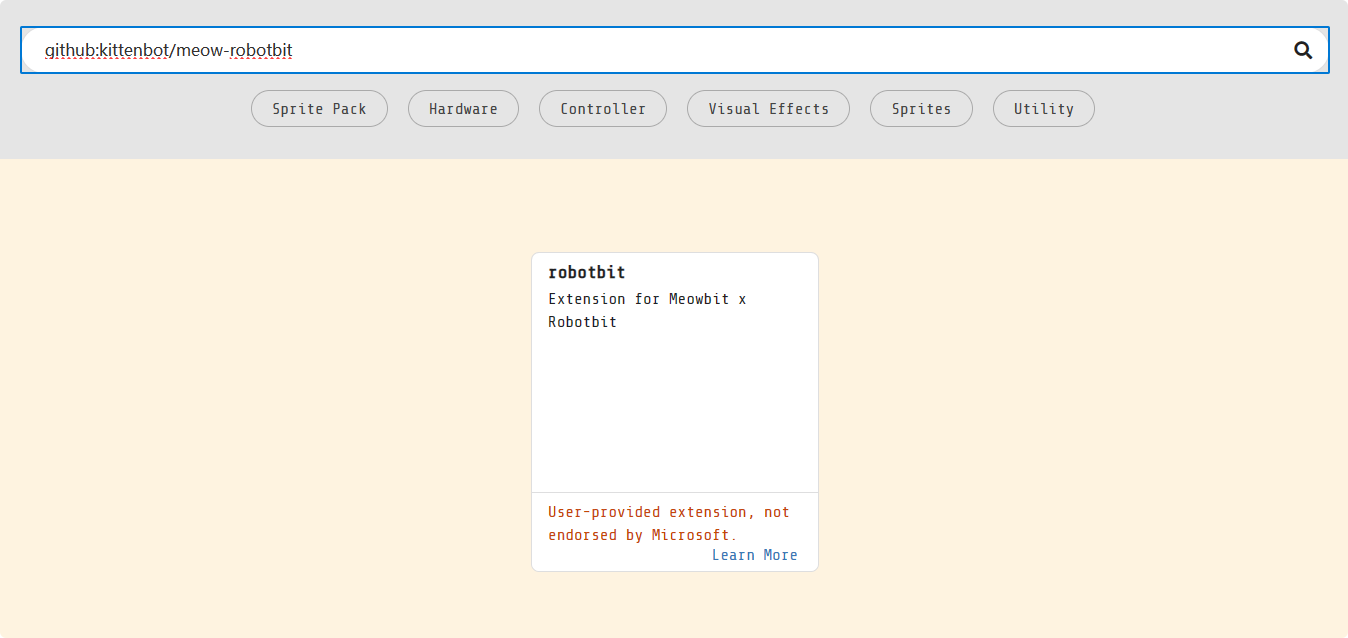
In the extension input bar, enter the following URL and click search
github:kittenbot/meow-robotbit
After loading the plugin, the following building block extensions will appear
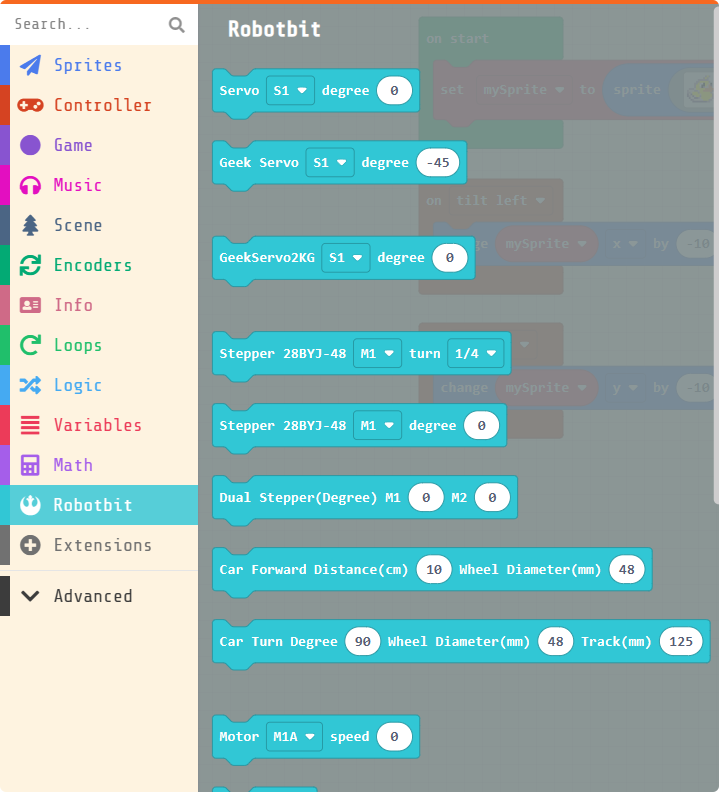
📋:Drive Motor
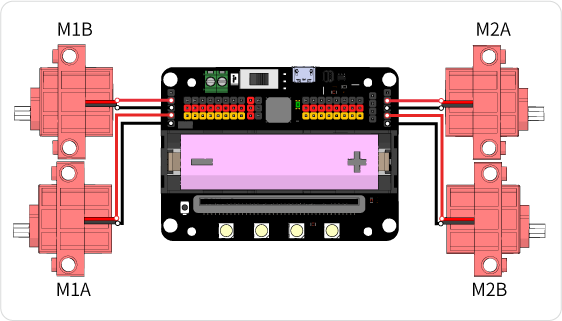
| No. | Block | Description |
|---|---|---|
| 01 | 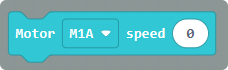 | Enable motor at a certain speed |
| 02 | 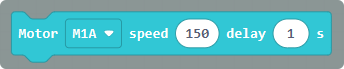 | Control the motor to rotate for a specified time |
| 03 | 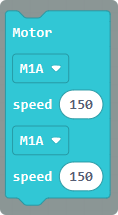 | Control two motors to rotate at the same time |
| 04 | 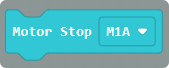 | Stop control of a single motor |
| 05 | 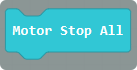 | Control the stop command of all motors |
📋:Driving Stepper Motor
| Serial Number | Block | Description |
|---|---|---|
| 01 | 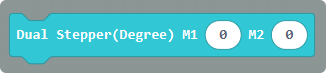 | Controls two stepper motors to rotate by an angle at the same time |
| 02 | 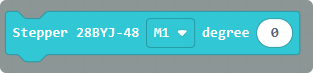 | Controls a single stepper motor to rotate by an angle |
| 03 | 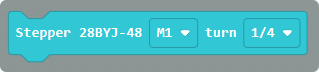 | Controls a single stepper motor to rotate by a number of circles |
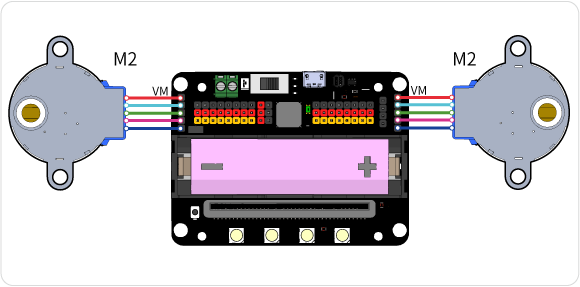
| 04 |  | A car equipped with two stepper motors; after filling in the diameter of the wheels, it controls the car to move forward by a specified distance |
| 05 |  | A car equipped with two stepper motors; after filling in the diameter of the wheels and the distance between the wheels, it controls the car to rotate by a specified angle |
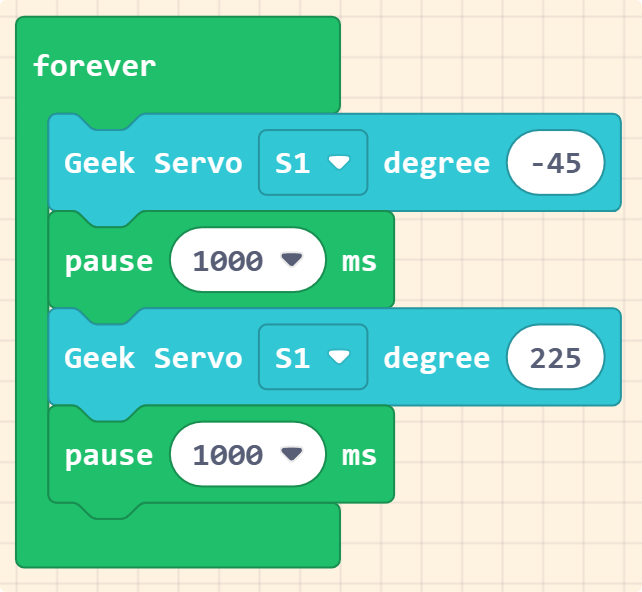
📋:Drive the geekservo 9g servo motor

Control the servo motor to rotate to a specified angle, the angle range is -45 to 225 degrees
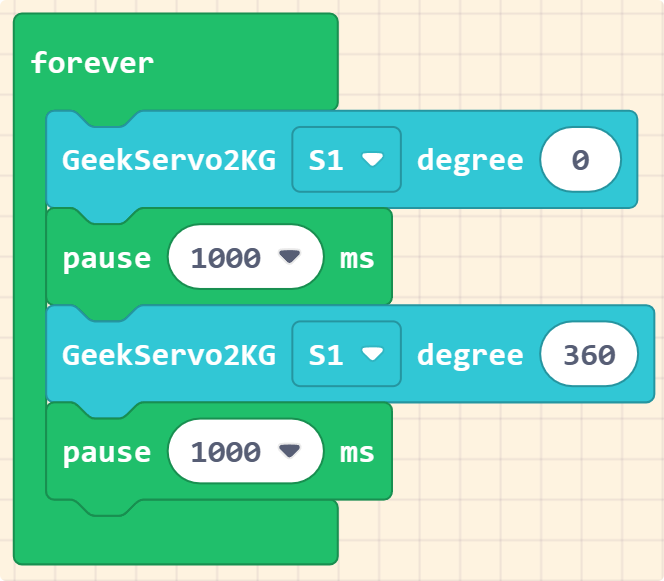
📋:Drive Geek servo 2kg servo


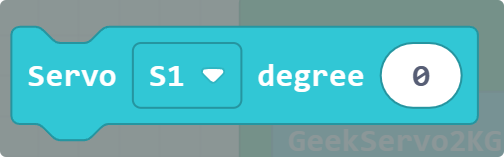
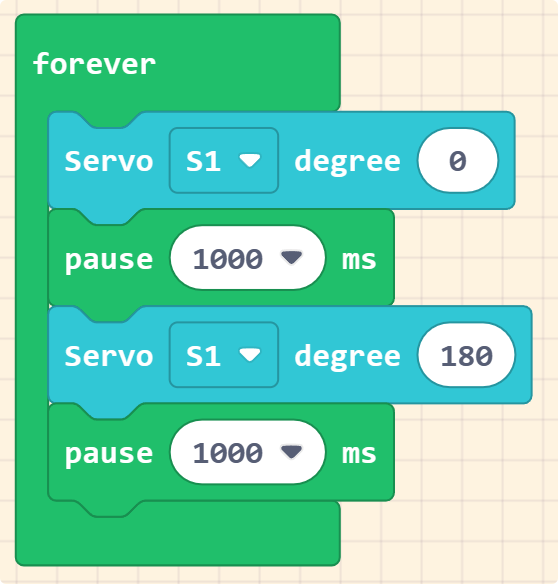
Control the 2kg servo to rotate to a specified angle, the angle range is 0 to 360 degrees
📋: Drive a common blue 9g servo
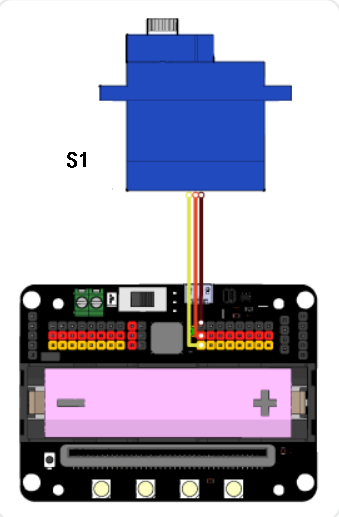
Control the blue 9g servo to rotate to a specified angle, ranging from 0 to 180 degrees
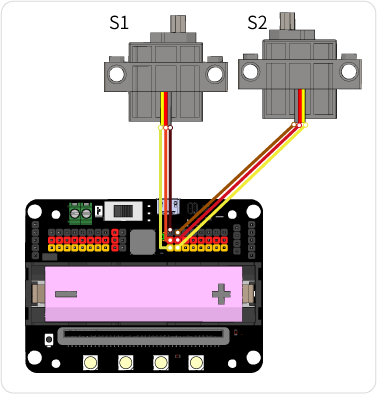
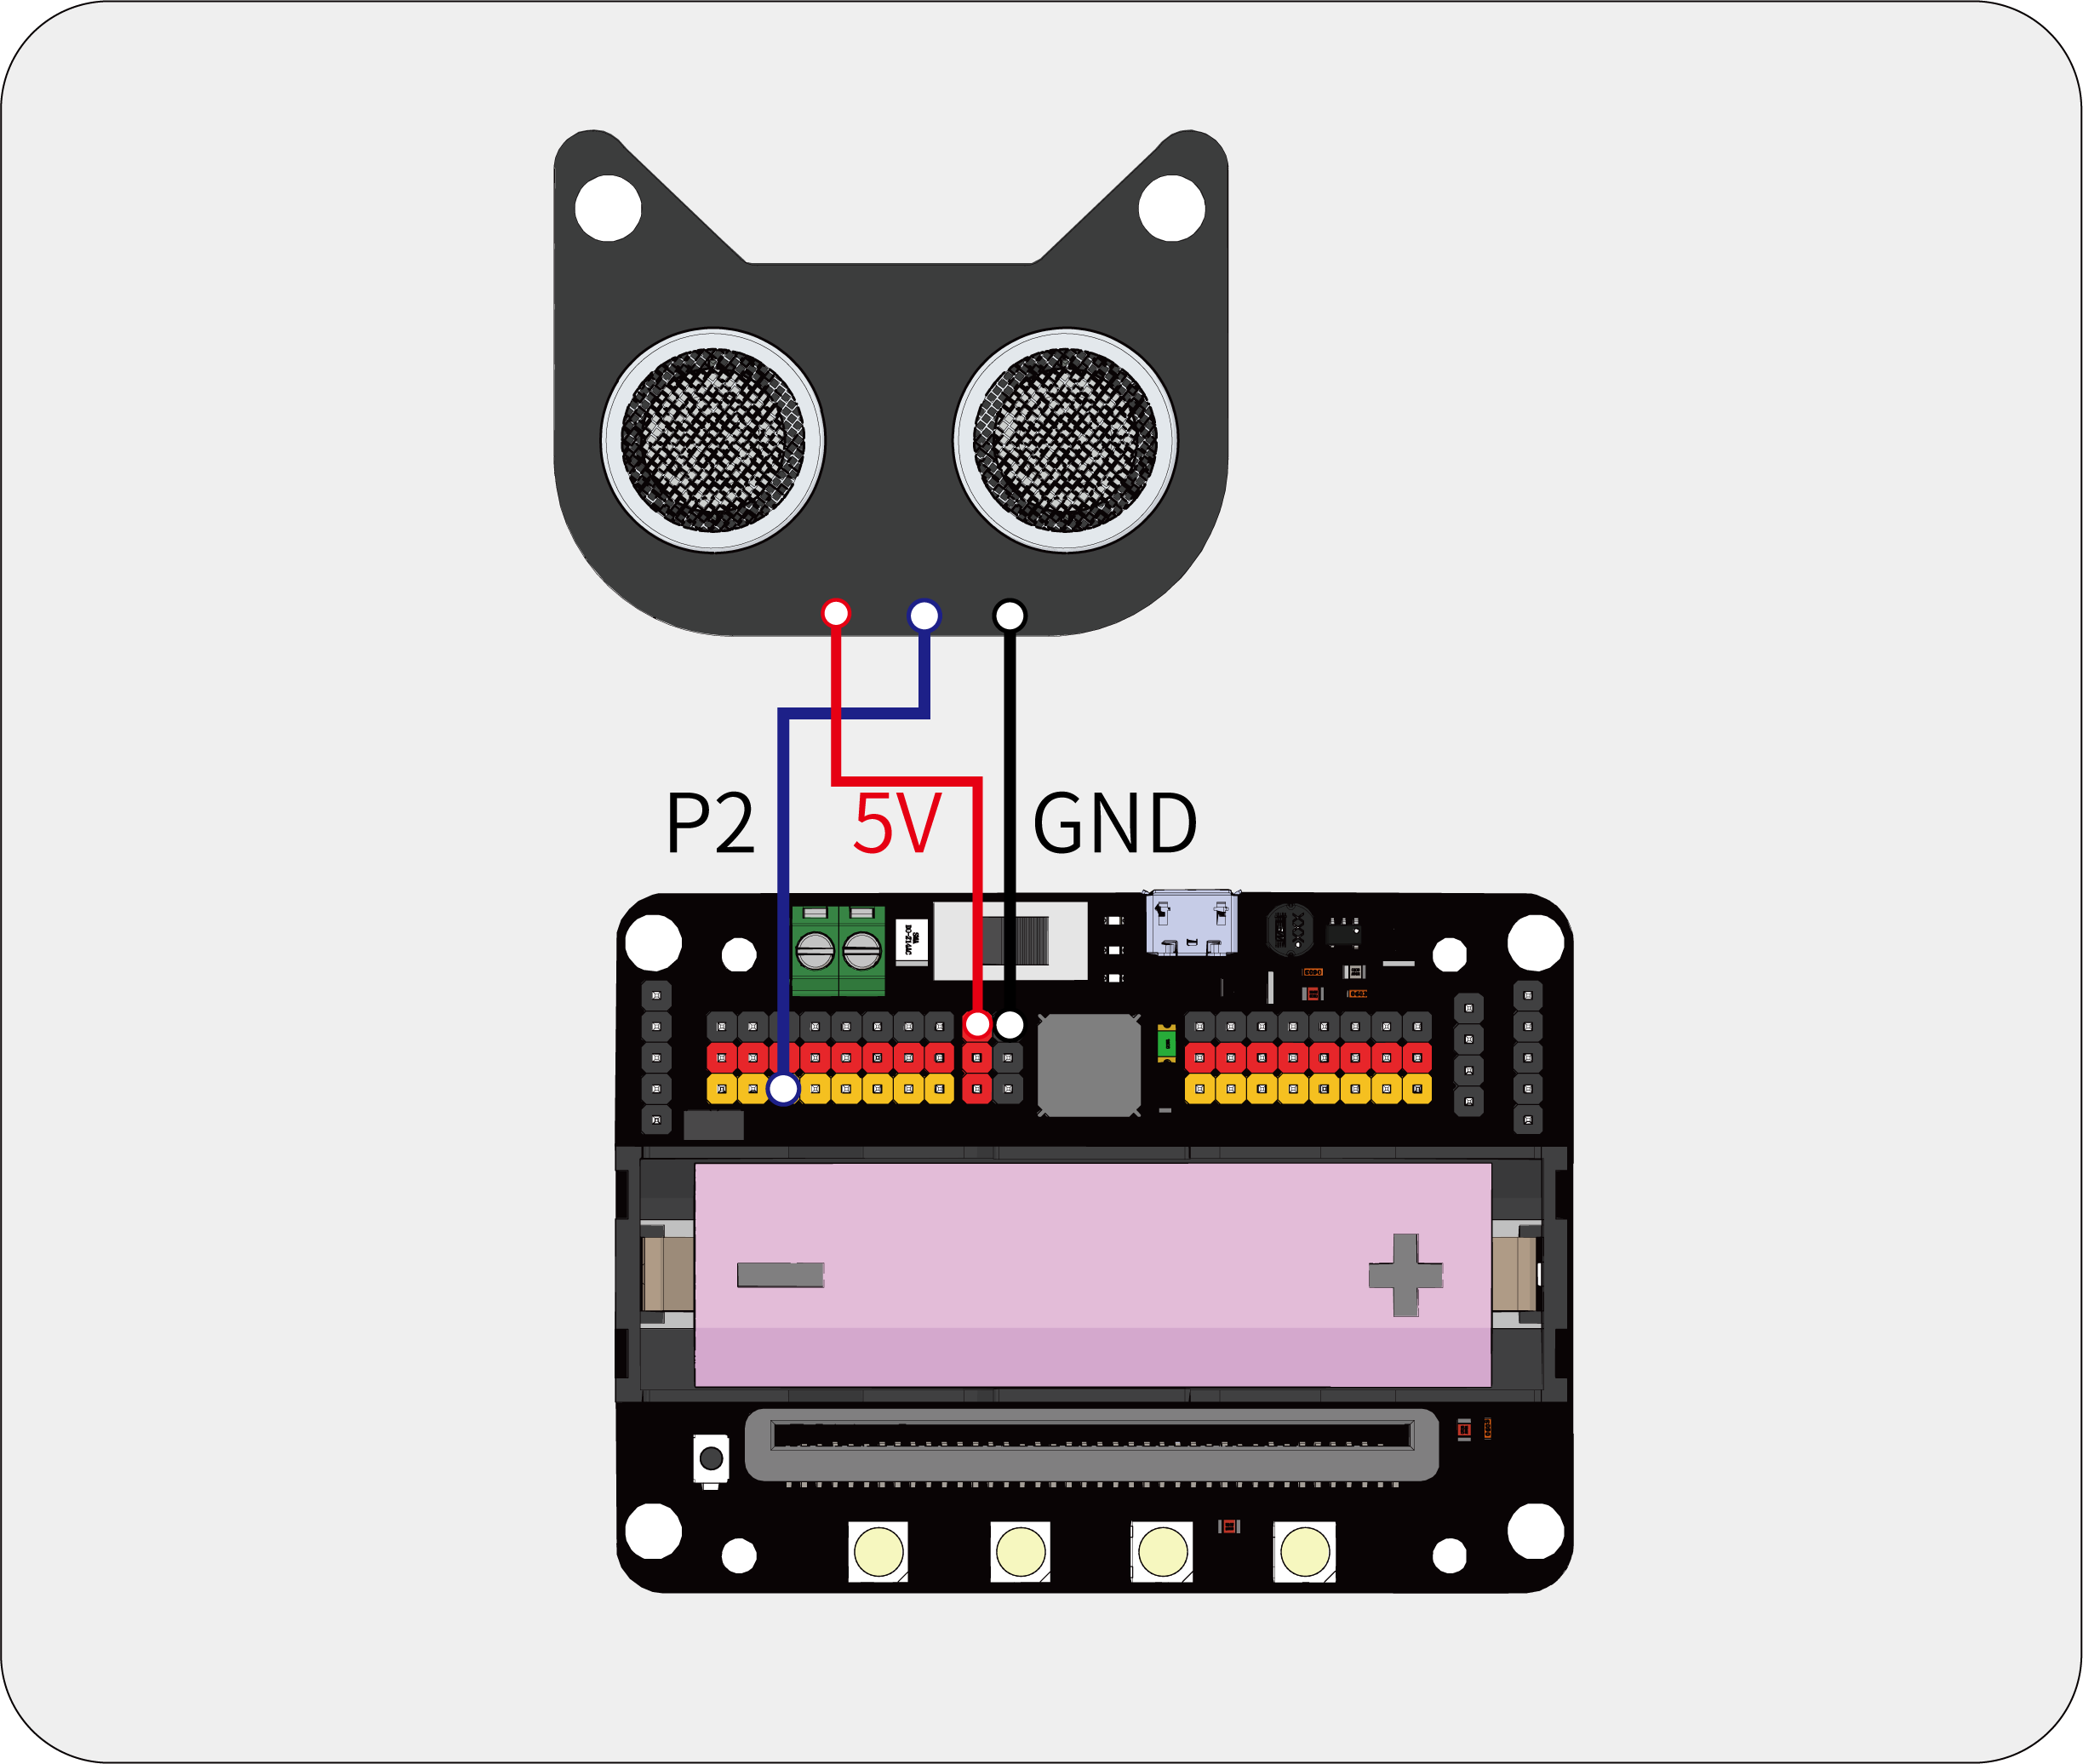
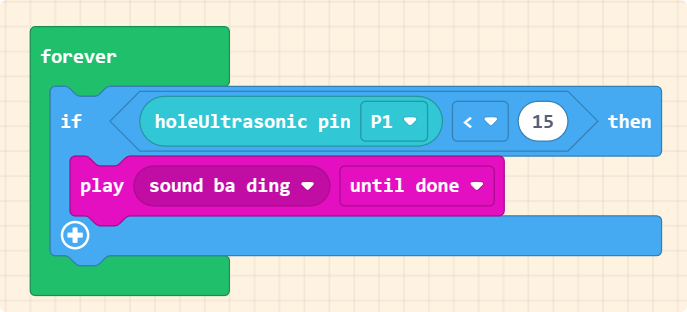
📋:Connecting to the Robotbit Ultrasonic

Wireless SD Module Usage
Purchase Link:
https://item.taobao.com/item.htm?spm=a1z10.3-c-s.w4002-21482550023.12.1a635d5fCeInSr&id=605430480347 Introduction: Only recommended for advanced users! Mainly used for 2.4G wireless communication with Microbit. Bluetooth is generally not used unless there is a special requirement
For more detailed tutorials, please refer to Wireless SD Module Tutorial Details Page
Release Notes
2024-3-29
- Modify Quick Start
2024-3-20
- Update document content based on latest status
2021-7-11
- Add onboard sensor examples
- Add micro-class link tutorial
2020-9-22
- Add quick start tutorial