quit start
By reading this chapter, you will learn how to use the product from scratch. If you are a beginner with no programming experience, please follow the steps exactly as described.
Software Preparation
New users of Kittenblock must first go to the page mentioned above to understand the basic information about software installation and operation.
Connecting the Main Control Board
1 - Connect the Data Cable
Use a Micro USB data cable (the provided cable is recommended) to connect the Micro:bit to your computer, as shown in the figure below.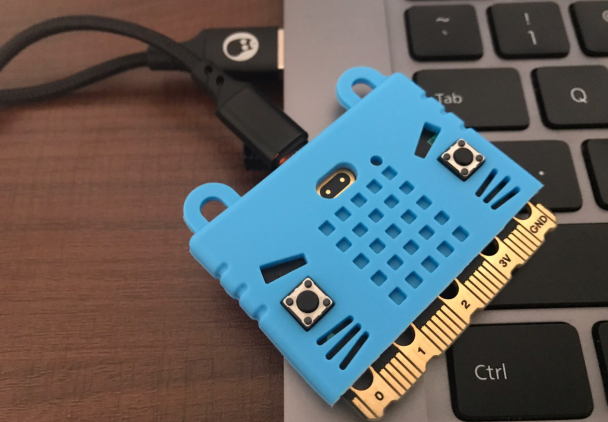
2 - (Select hardware based on the physical device
Open the software and first select according to the hardware you received (which should be Micro:bit V2).
How to distinguish between V1 and V2:The version with a notch below the gold fingers is V2.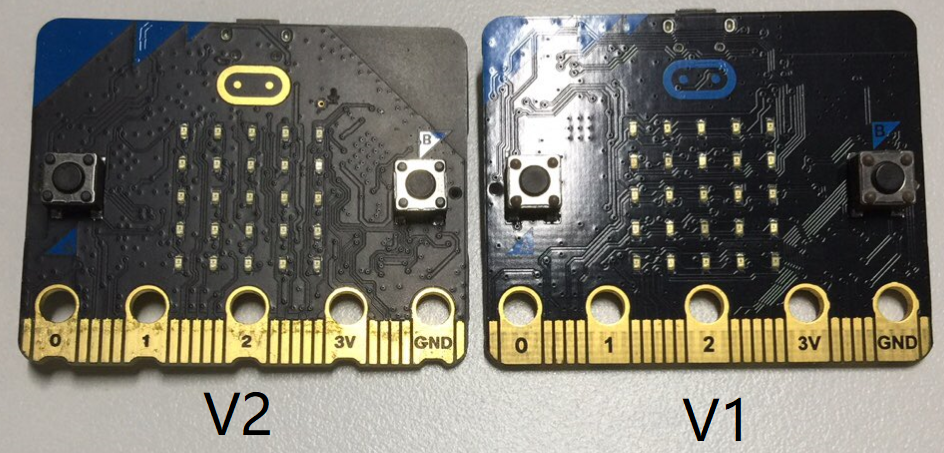
3 - Restore Firmware
Click the Restore Firmwarebutton on the side and wait for the process to complete.

Restoring the firmware is done to clear the programs in the micro:bit and burn the necessary libraries, preparing the micro:bit for communication with the Kittenblock software.
4 - Serial Port Connection
如果你已经顺利完成了以上3步,此时你要做的就是点击连接,让Kittenblock软件和micro:bit硬件建立通讯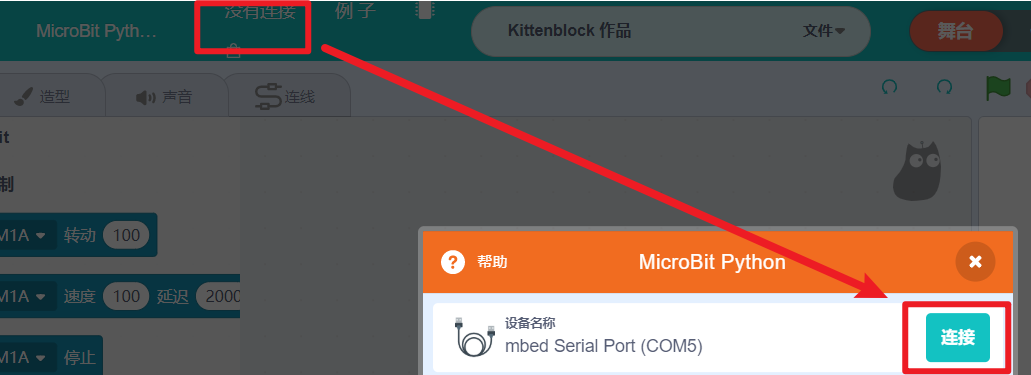
If you have successfully completed the above three steps, what you need to do now is click Connectto establish communication between the Kittenblock software and the micro:bit hardware. ❓Reference Help
Start Programming
After selecting the correct hardware, the corresponding programming blocks available for that hardware will appear on the left. The plugins involved in the micro:bit Little Inventor kit include micro:bitV2 and Robotbit (they have already been loaded and can be used directly).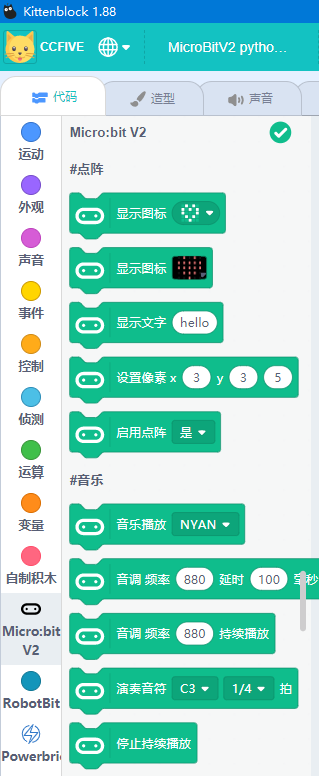
Stage Interaction
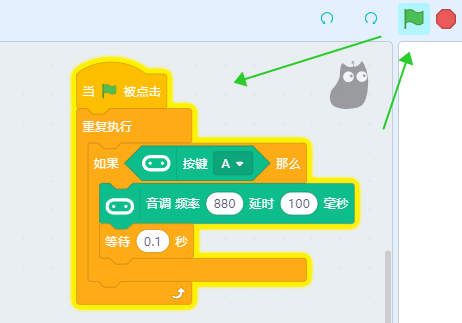
After completing the firmware restoration and successfully connecting to the micro:bit serial port, you can preview effects by clicking on code blocks.
- Drag the LED Matrix Block from the left sidebar and click it. You will see the micro:bit's LED matrix display a heart shape.
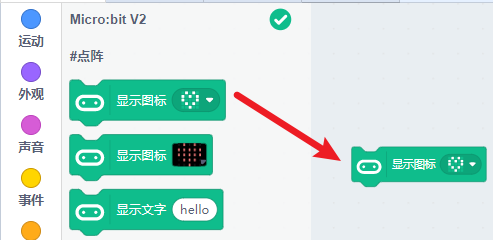
- In this way, you should understand that the so-called interaction means directly previewing effects by clicking on code blocks/code segments. For example, take the following program:
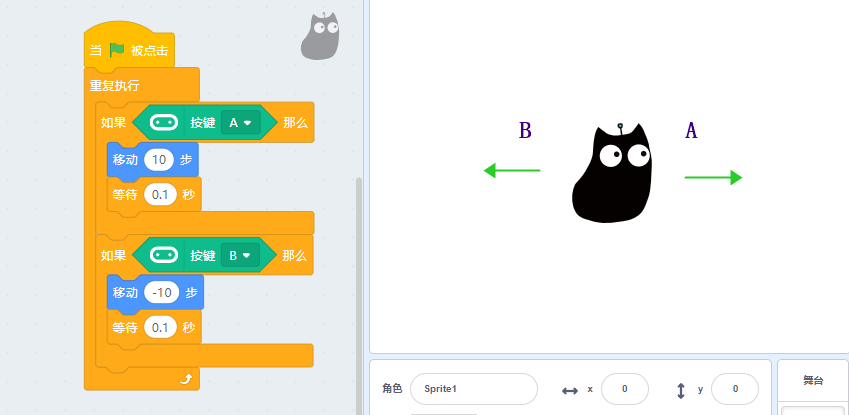
- The above points 1 and 2 only explain the concept of interaction, but do not yet demonstrate the full potential of stage interaction. The following example can help you understand it better.
- Summarizing and understanding the concept of
Stage Interaction::
Through the three examples in the above Stage Interaction, we can clarify the two meanings of interaction:
- Seeing the board's operation effect by directly clicking on program blocks.
- Using programs to interact the micro:bit with the software stage, creating interesting real-time applications.
However, stage interaction also has limitations—it cannot operate independently of a computer and must be connected via a data cable.
Program Upload
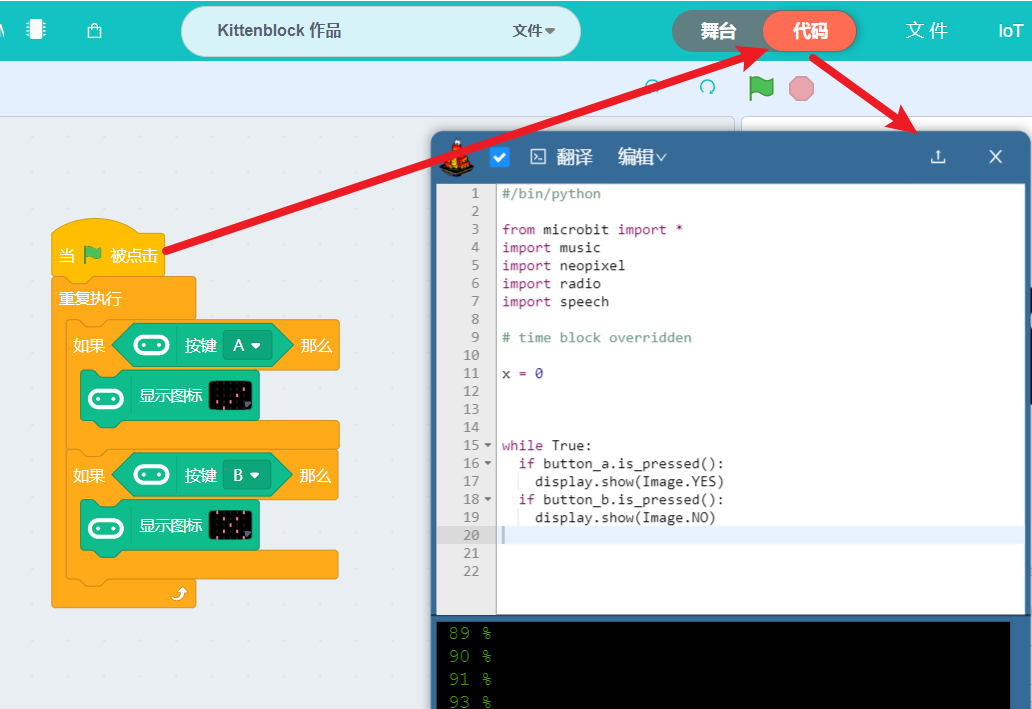
Understand the concept of program upload and distinguish it from stage interaction:When we need the micro:bit to run programs independently without a computer, the code blocks must be converted into a language the micro:bit can recognize and burned into the device. This process is called program upload.
Follow these steps to quickly learn how to complete a program upload:
Find and assemble the exact code blocks shown in the figure below
Follow the arrow indicators to proceed step by step
- After completing the program upload, there is a key difference to note. When we reconnect the serial port and try to directly interact by clicking code blocks for "Stage Interaction," it will not work. Remember the following point:[danger
After uploading a program once, if you want to perform "Stage Interaction" again, you need to follow the initial connection process: first click "Restore Firmware," then connect the serial port, and only after that can you perform interactive operations.