Assembly_Tutorial
Bottom Plate Installation
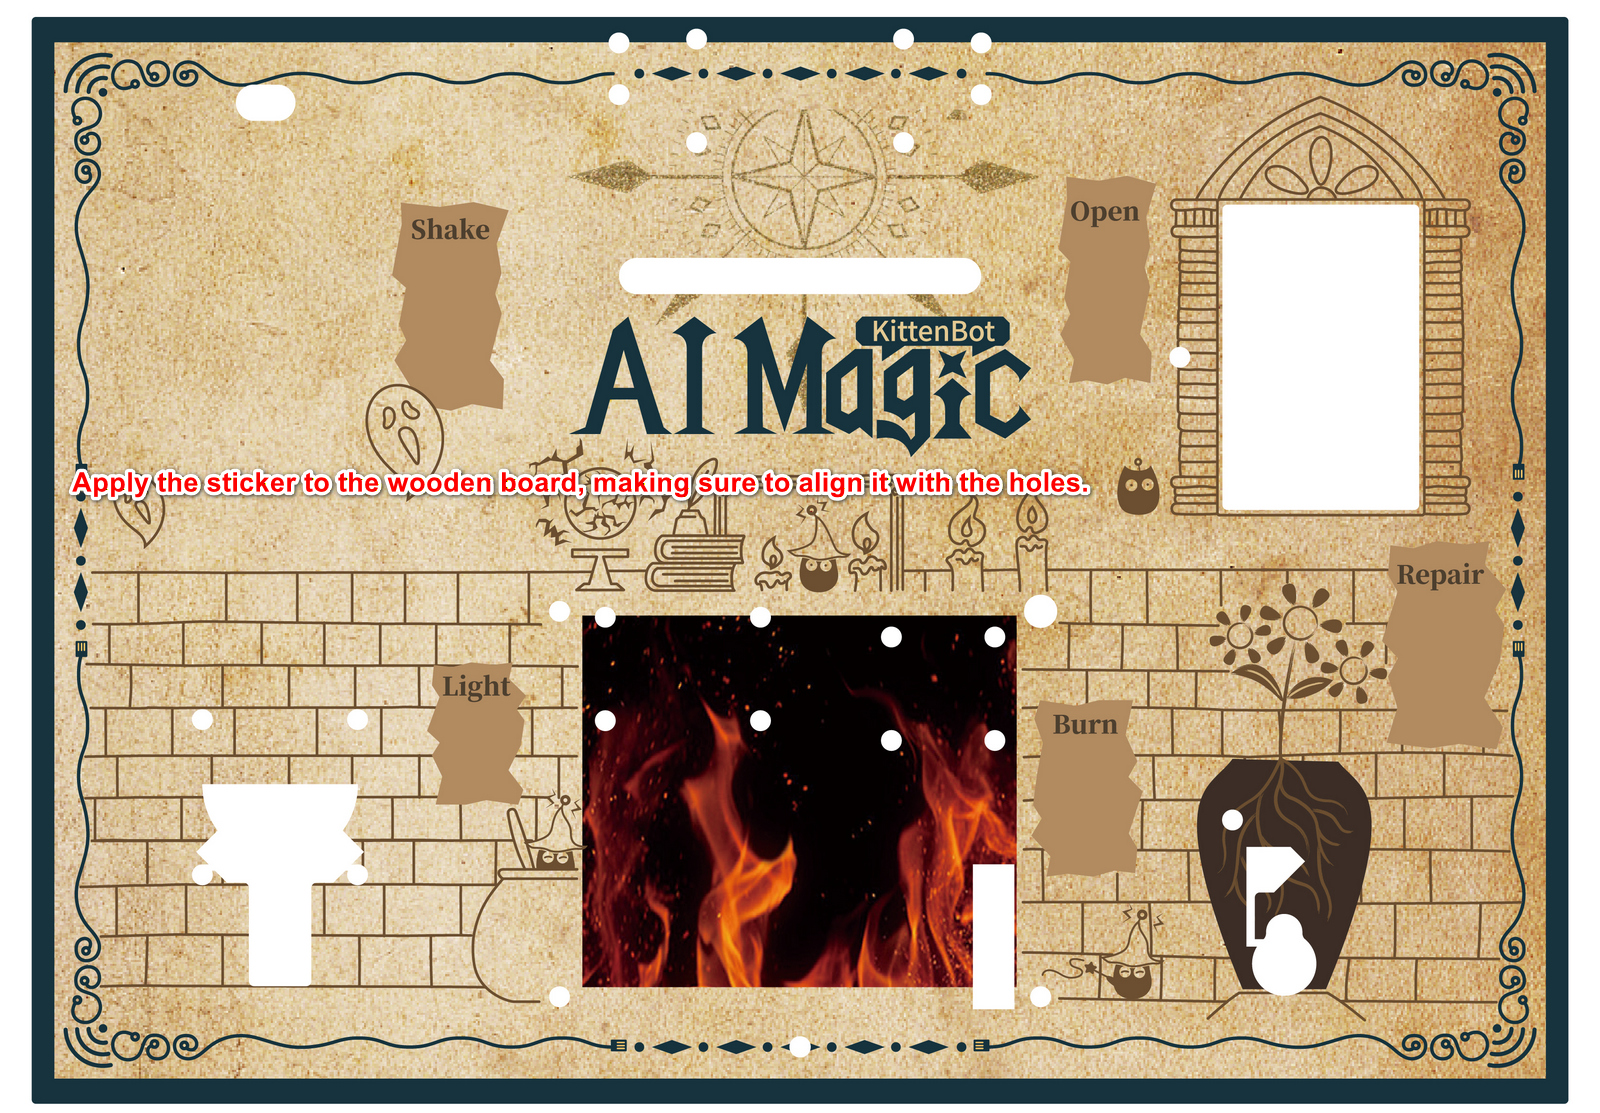
Paste the removed stickers onto the wooden board.
- Power management module *1
- RGB light strip module *1
- Servo control module *1
- micro:bit expansion board *1
- Round-head screws *24
- Copper standoffs *12
Fix the module onto the copper standoffs.

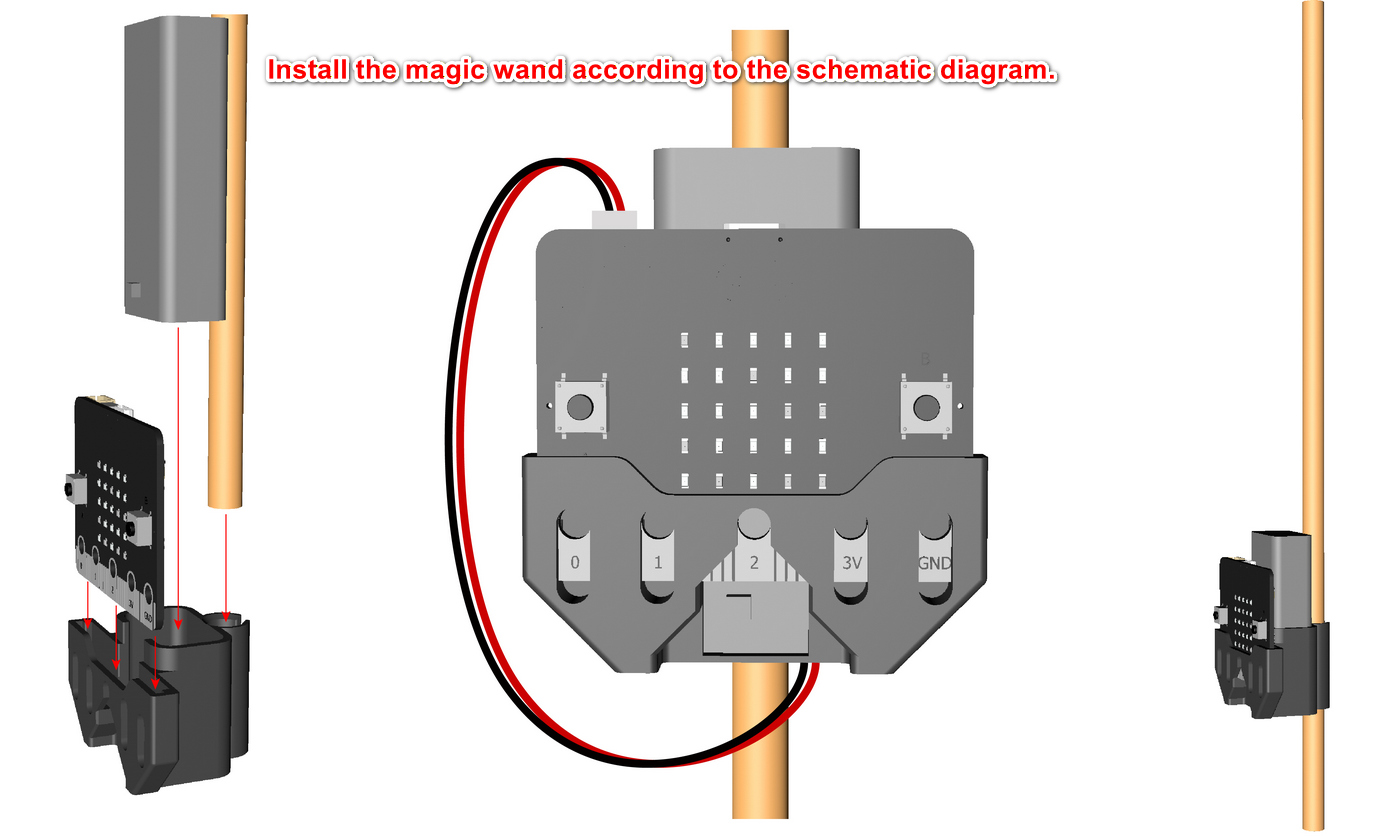
Be careful not to install the module's gold finger contacts in the wrong orientation as shown in the diagram.
Functional Module Installation
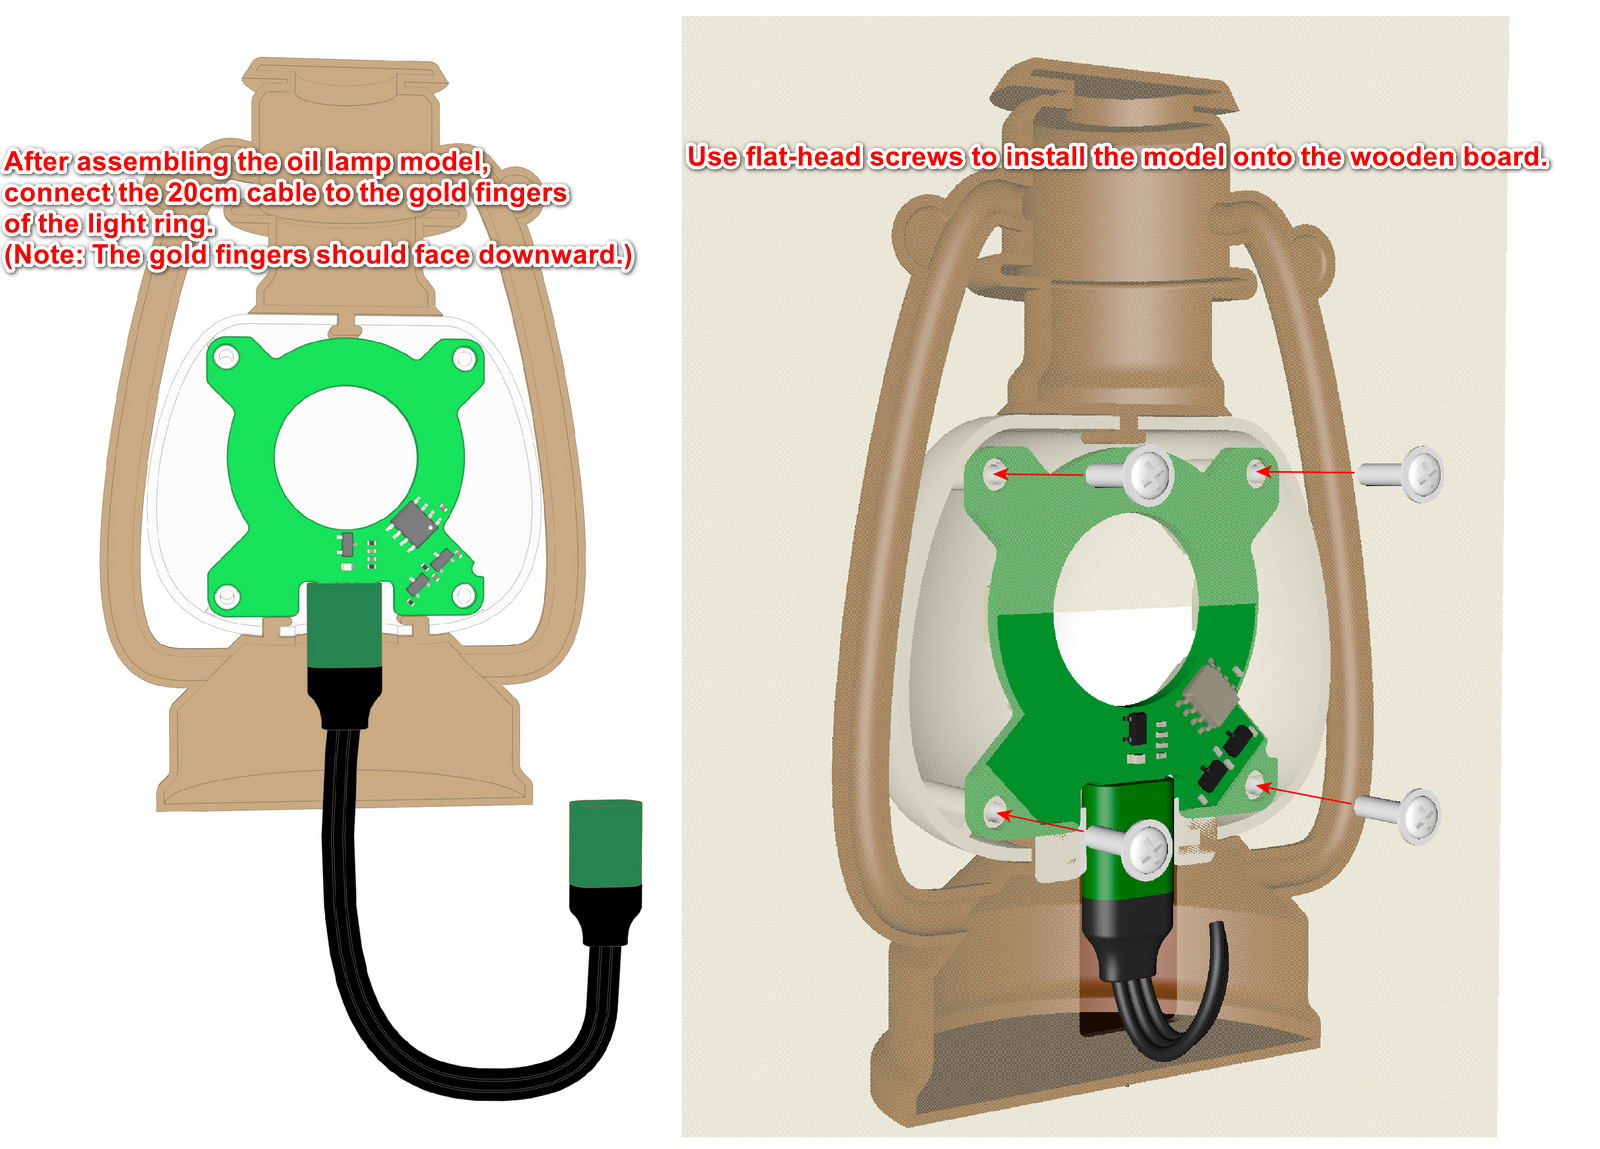
RGB Ring Light Model
- RGB Ring Light * 1
- Connection Cable (20CM) * 1
- Oil Lamp Model * 1
- Flat-head Screws * 4
RGB Light Strip Module
- Round head screws *2
- RGB light strip *1
- Fireplace printed part *1
- Round head screws *2
Installation Steps
- Peel off the RGB light strip sticker.
- Snap the light strip into the light strip slot of the fireplace.
- Connect the RGB light strip wiring to the RGB light strip control module.
- Secure the fireplace to the wooden board.
Before attaching the light strip, first insert it into the slot of the fireplace to enhance its stability.

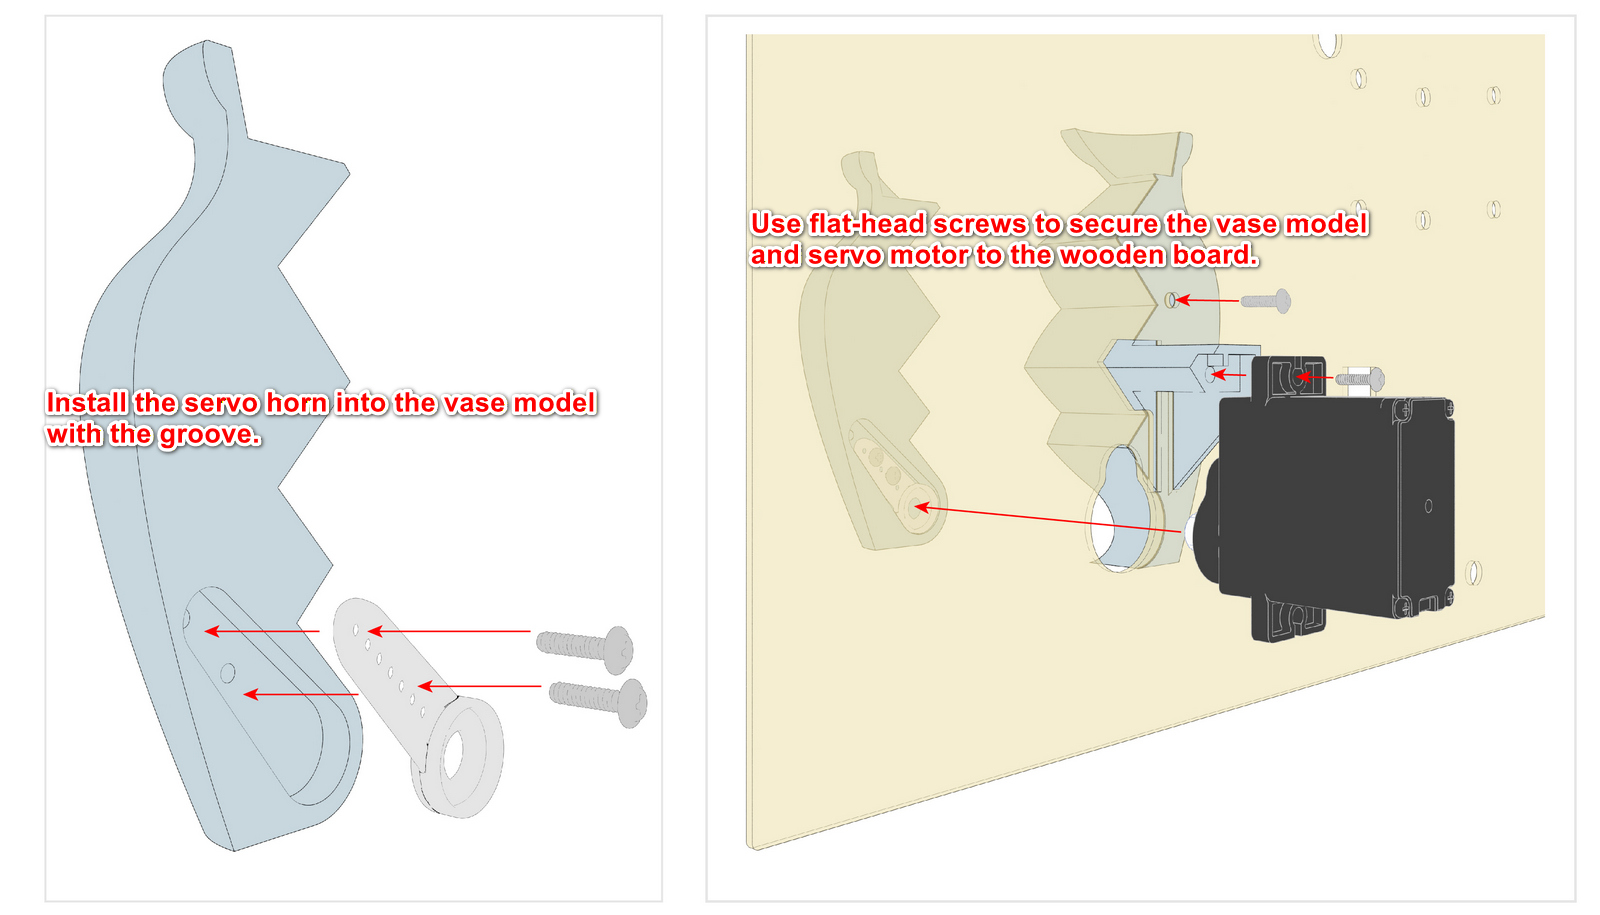
Vase
- Flat-head screws *2
- Vase model *1
- Servo motor *1
- Servo horn/wheel *1
- Servo screws *2
Before installing the vase on the servo horn, adjust the vase breakage angle.
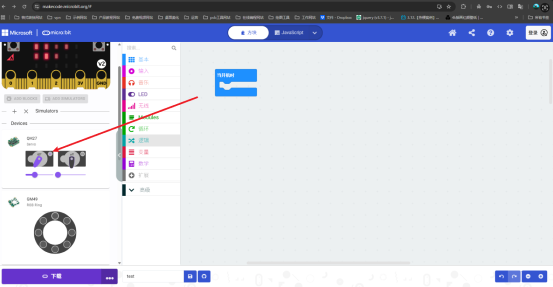
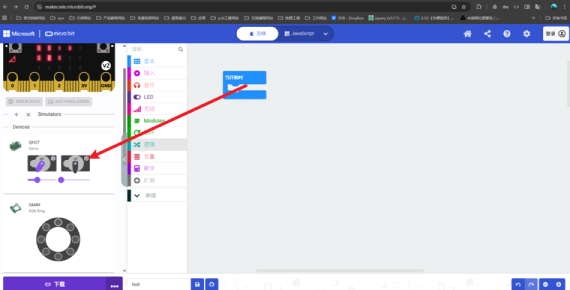
Open MakeCode and download a control program with the Jacdac extension added.
Then reopen MakeCode to see the connected Jacdac hardware.
Next, determine the vase breakage angle.
For how to add the Jacdac extension, please refer toJacdac module
Click the power button to initialize the servo angle and control the vase breakage and repair angles.
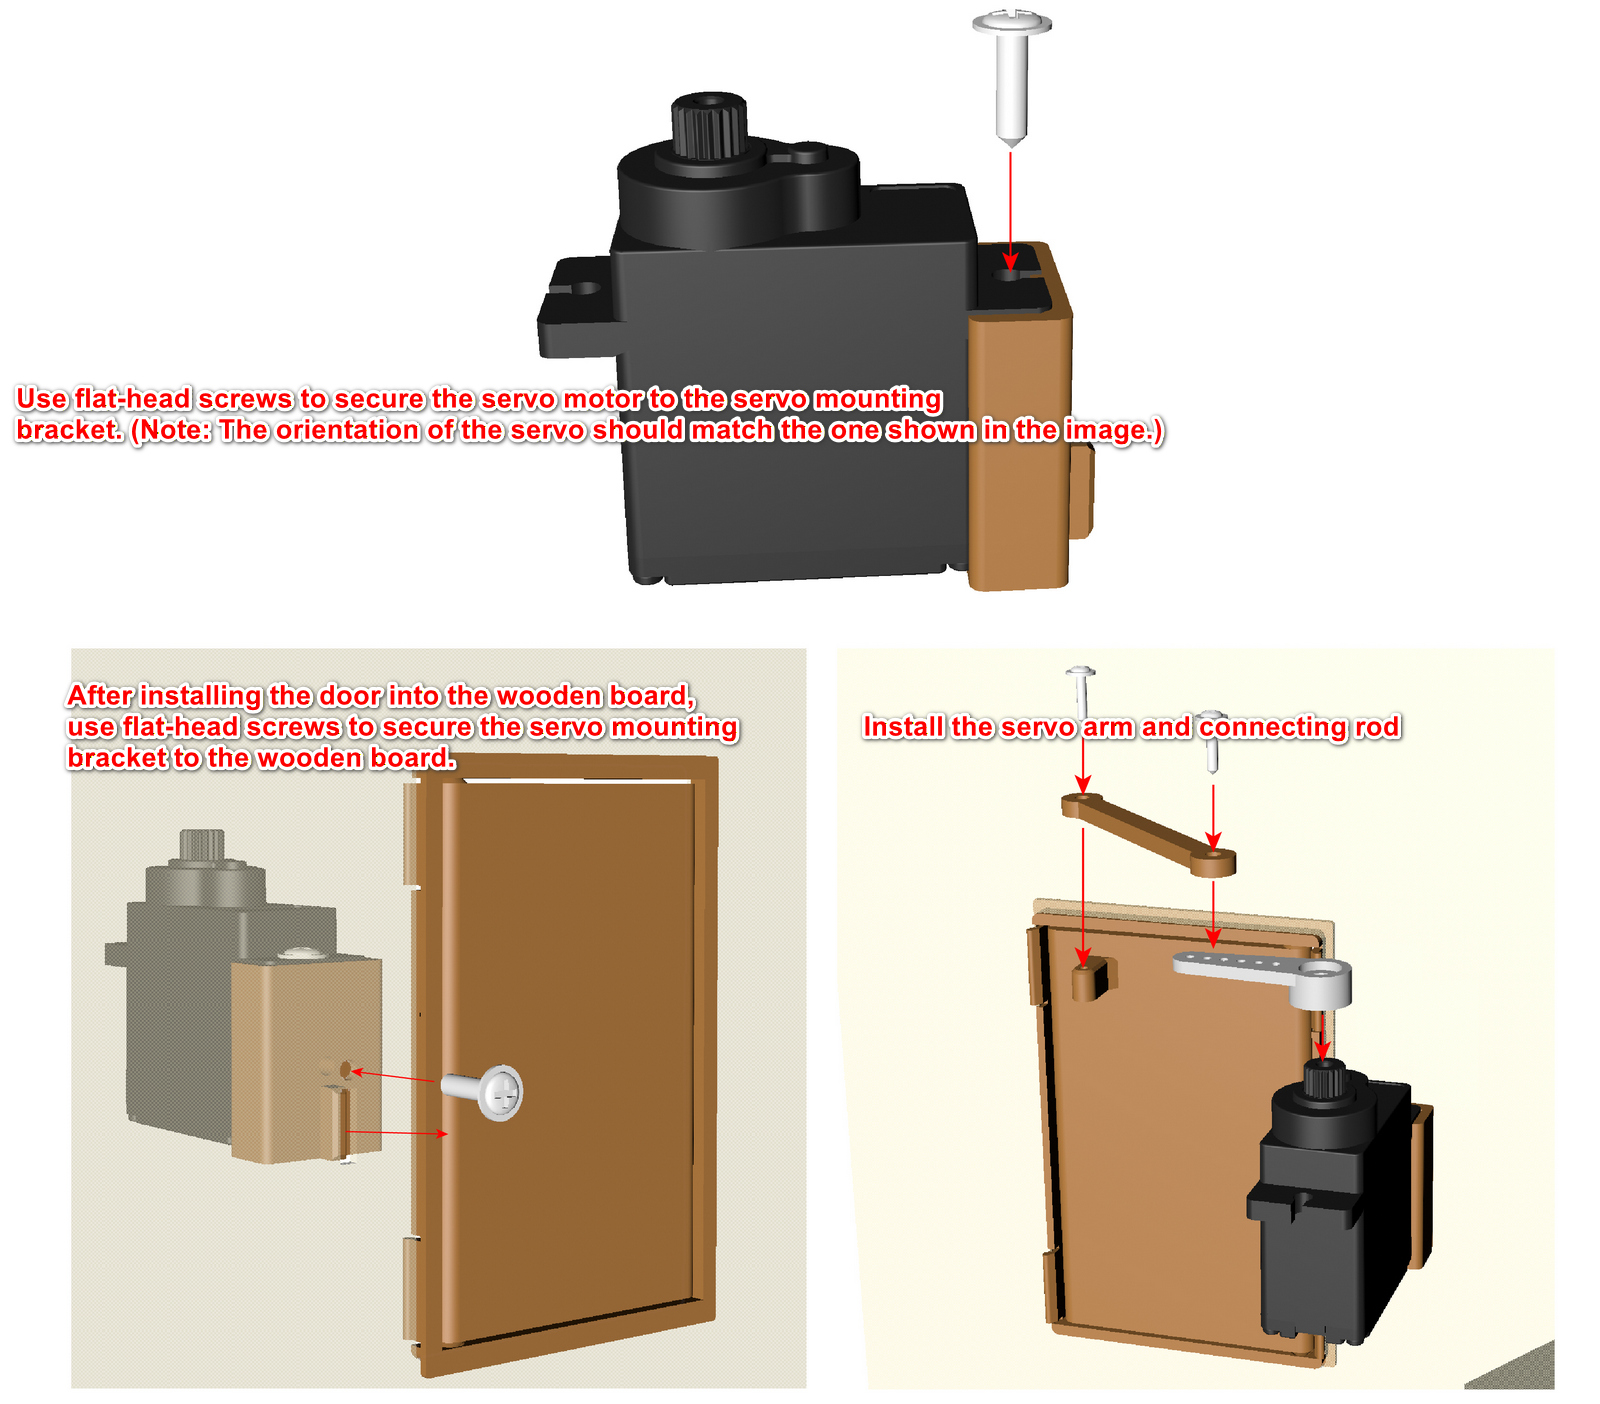
Magic Door Module Installation
Servo screws *4
Flat-head screws *2
Door model *1
Servo motor *1
Servo horn/wheel *1
noteThe servo angle initialization steps for the magic door module are the same as for the vase module. Control the angles for opening and closing the door.
Vibration Module
- Ghost model *1
- Vibration module *1
- Connection cable (20CM)
- 3D printed part
When connecting any Jacdac module to the micro:bit expansion board, it can be attached to any of the board's gold finger contacts. A connection is established as long as physical contact is made.
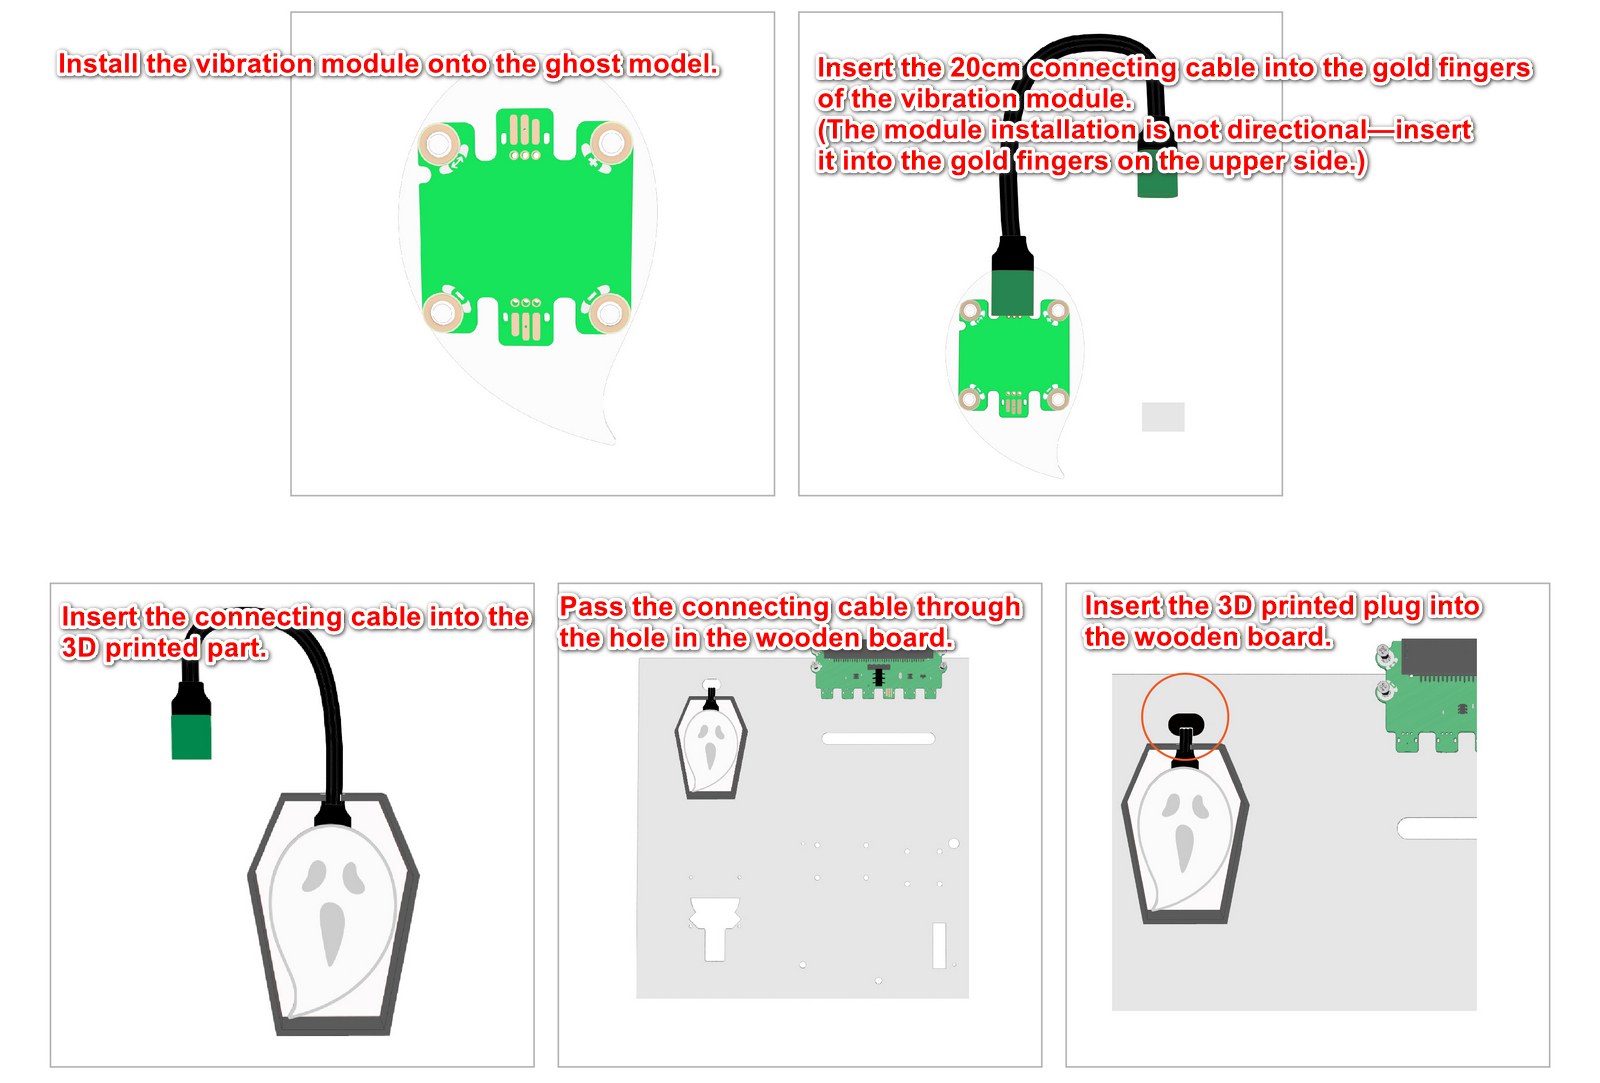
The ghost should not be attached directly to the oil lamp. Maintaining a small distance above the oil lamp can improve the vibration effect.
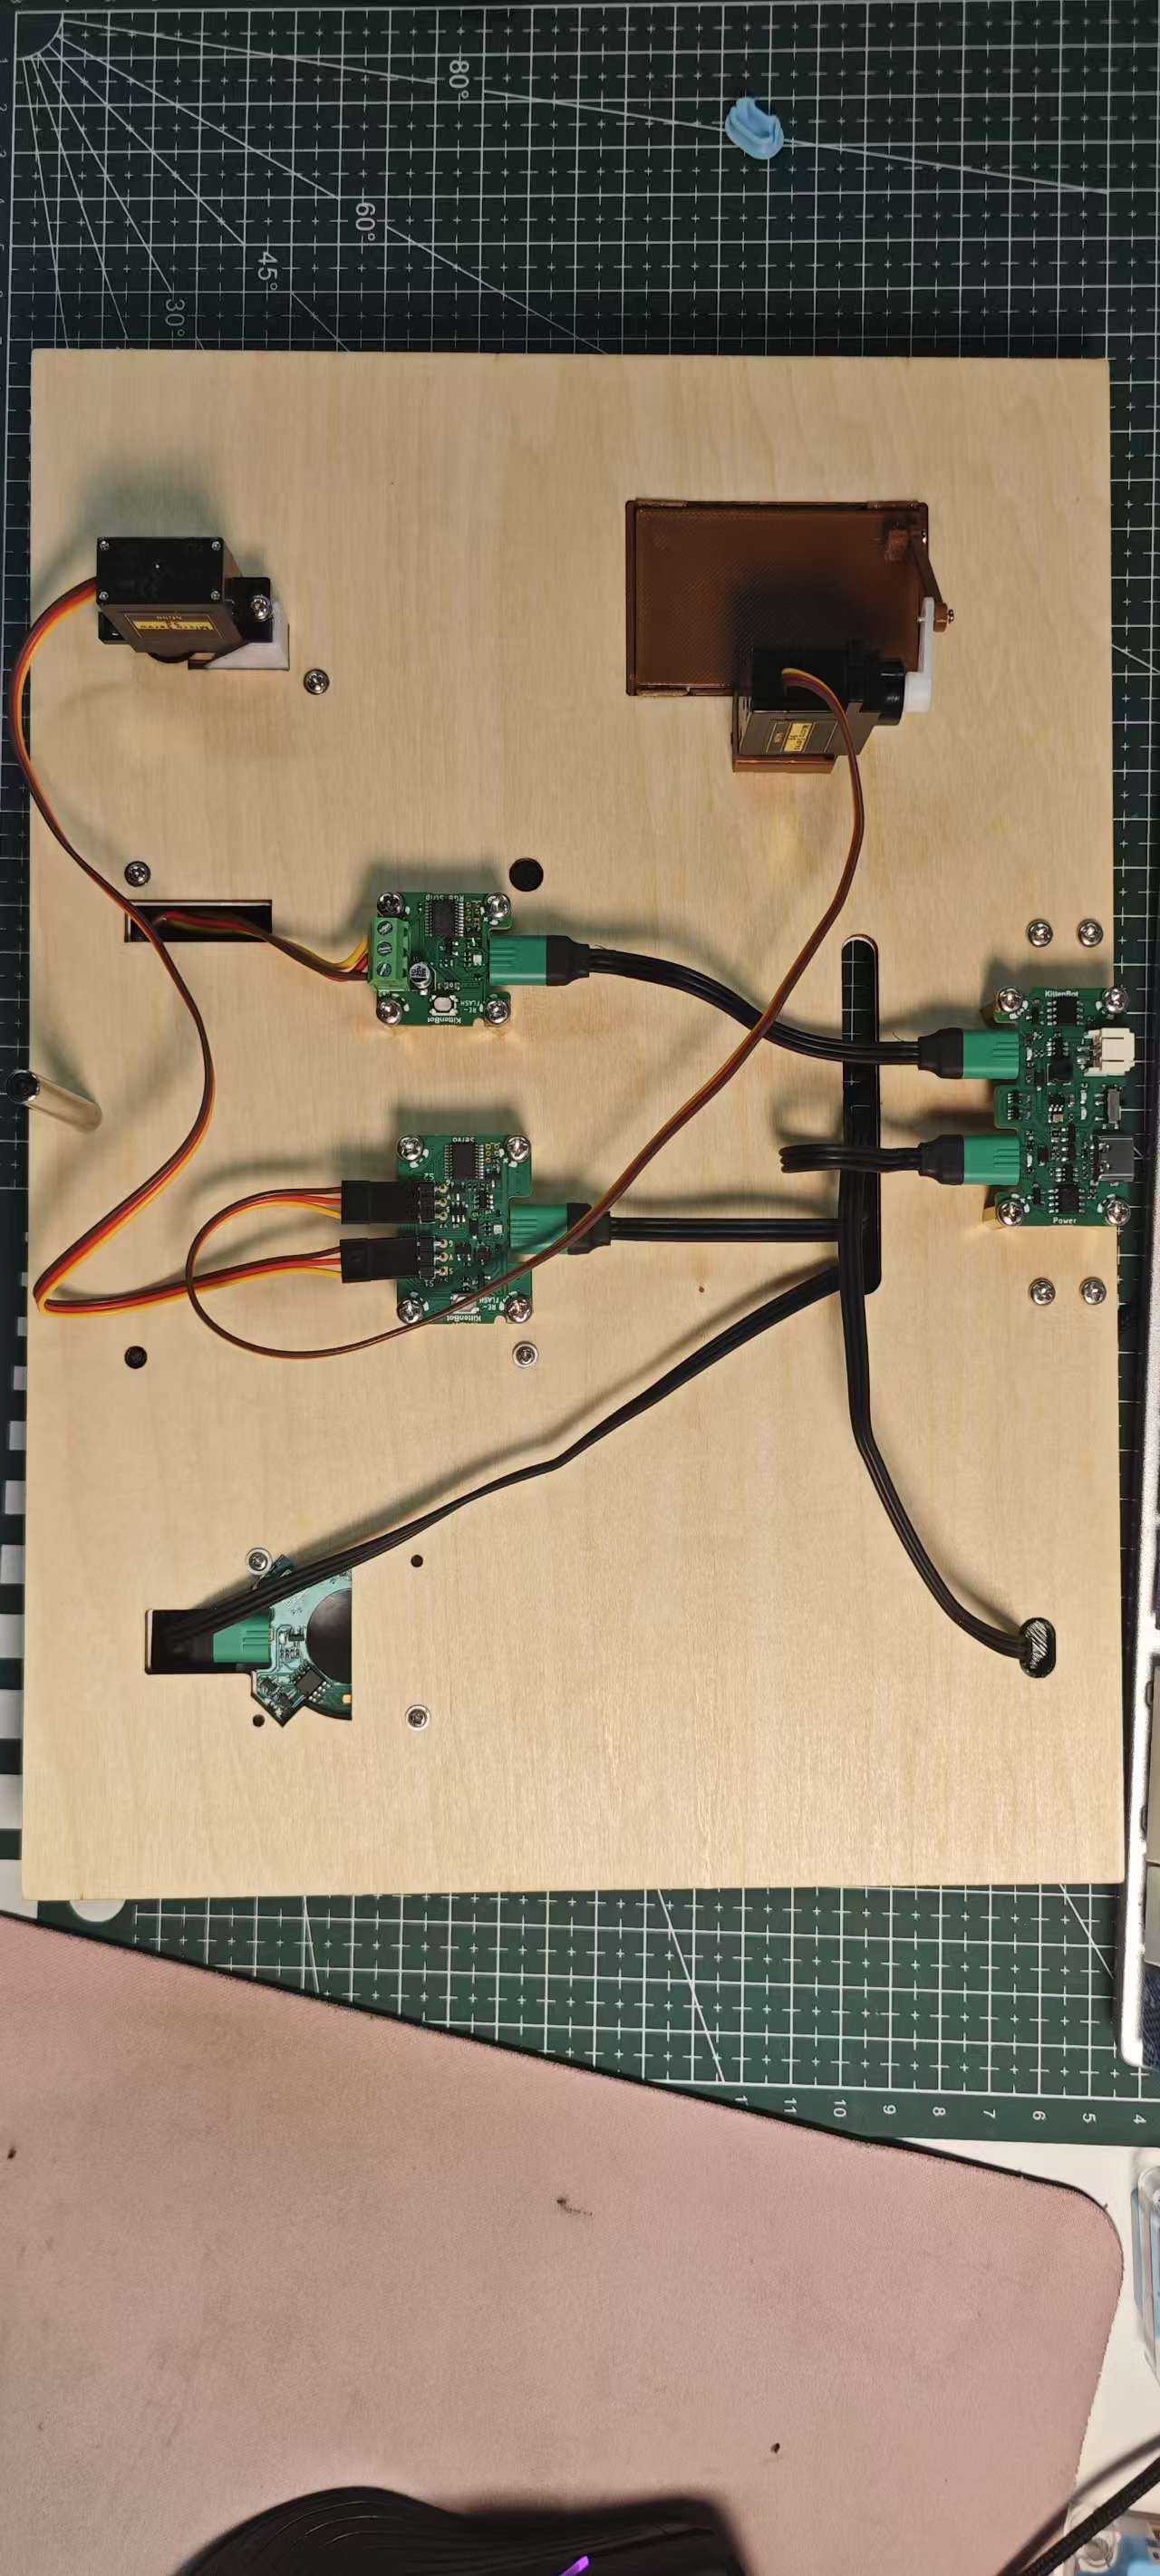
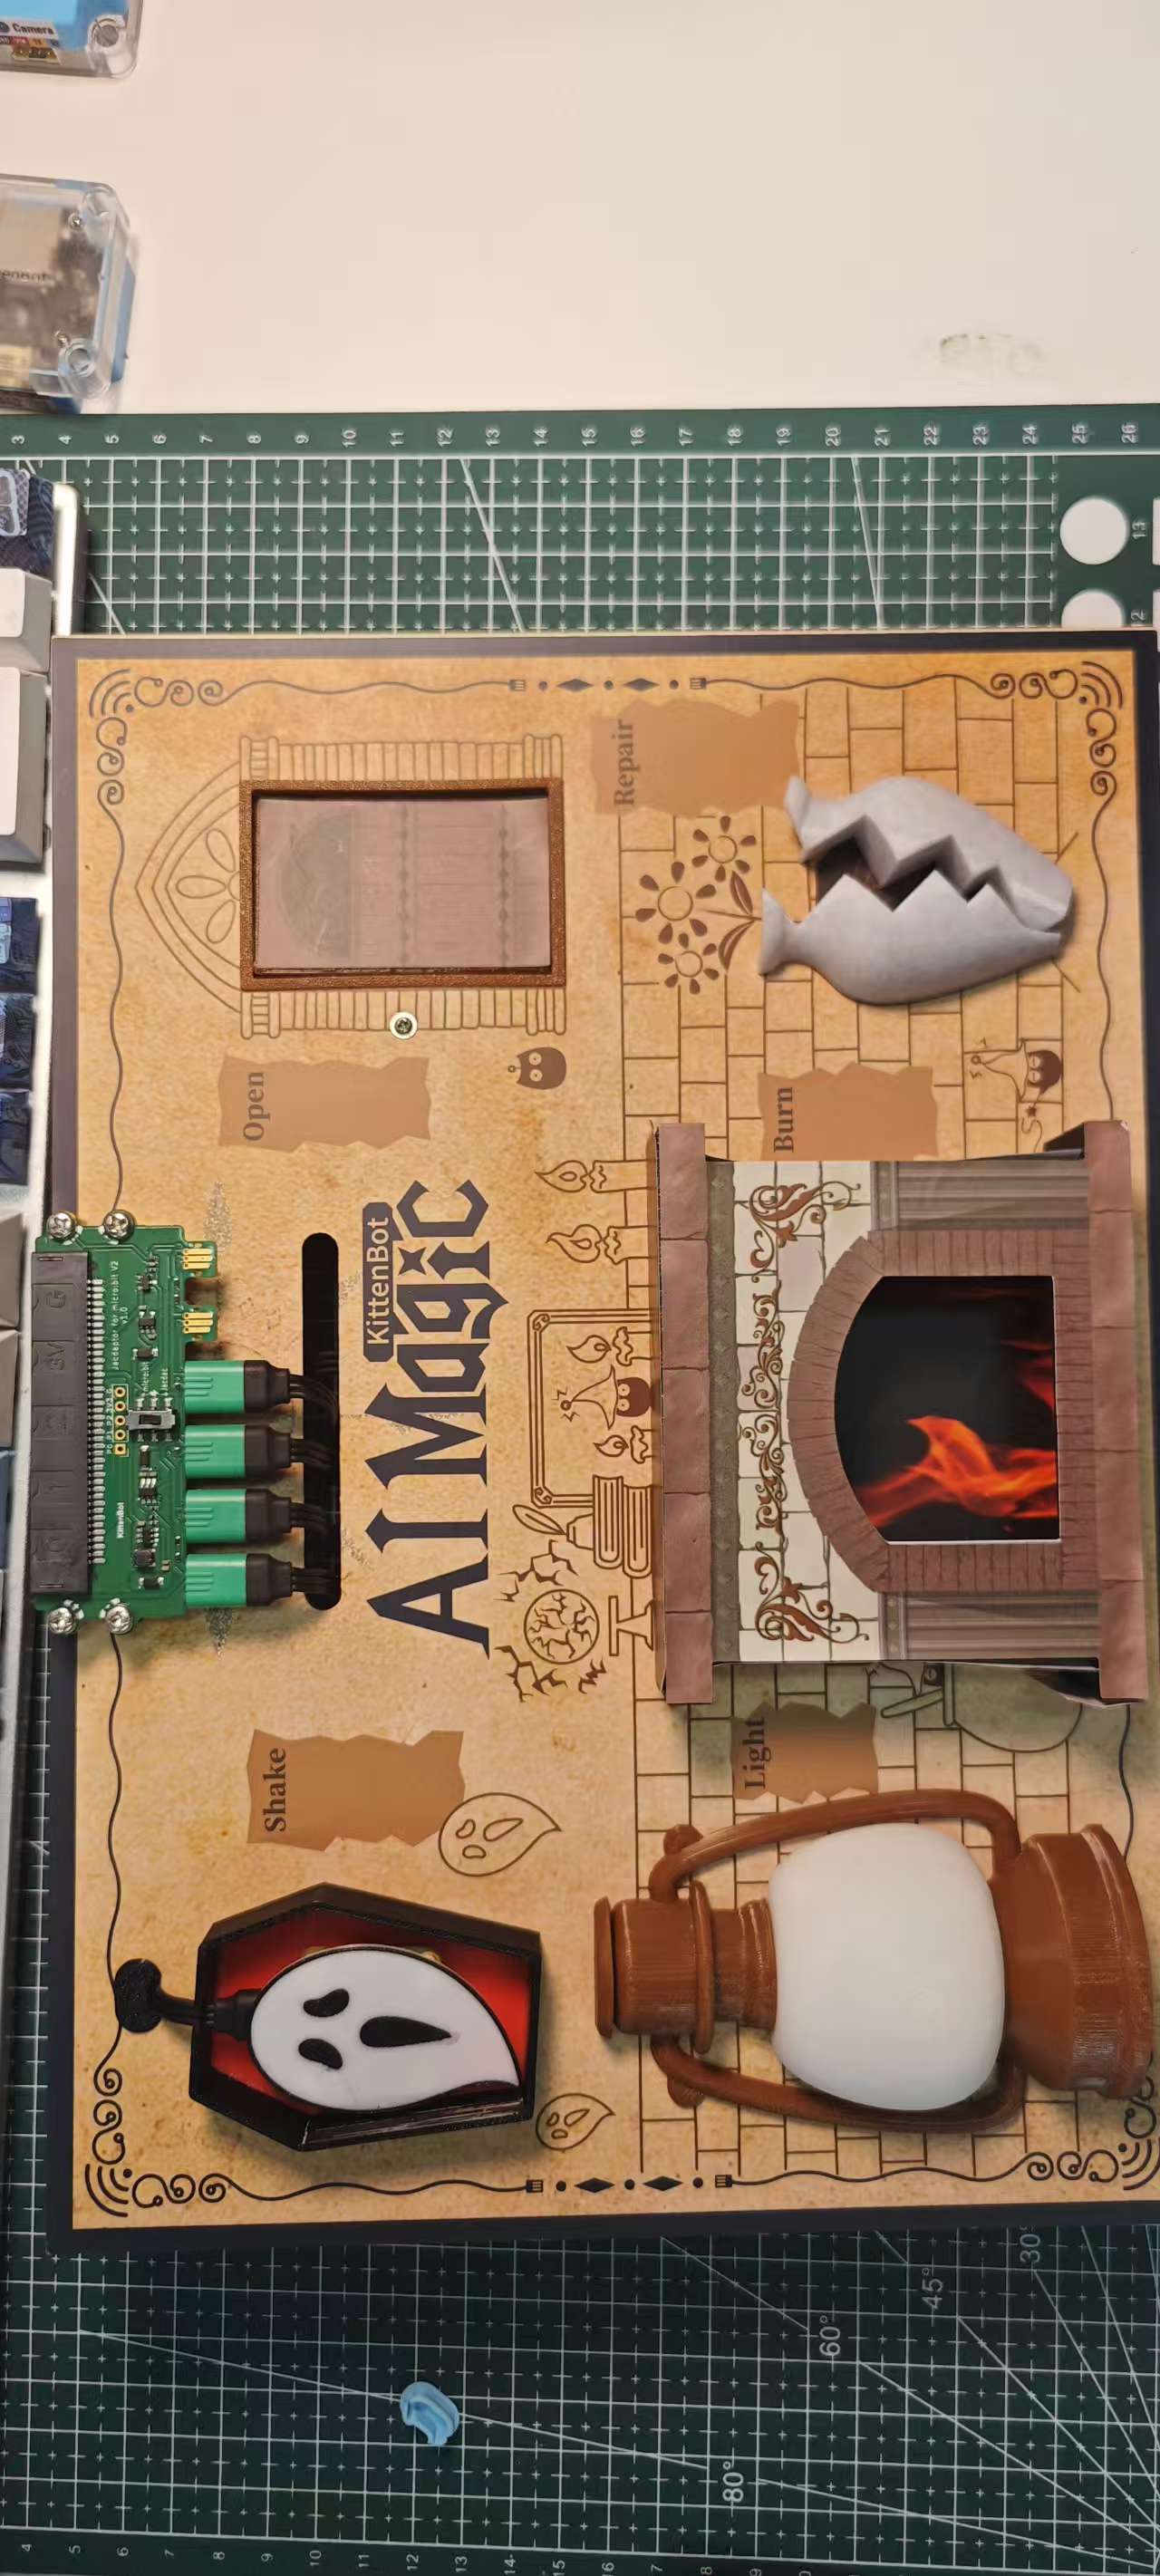
Completed Assembly Diagram + Wiring Schematic
Install Support Feet
Magic Wand Assembly