01QuickStart
TabbyBot Quick Start
Introduction:
TabbyBot is a STEM robot car designed for Microbit programming. It utilizes a 18650 lithium battery, which provides sufficient power to drive power-hungry modules such as the AI camera module or voice recognition module, eliminating the need for multiple dry batteries. It comes with a built-in charging and discharging circuit, making it convenient to use.
TabbyBot features programmable resources such as LED, RGB, line-following sensor, infrared receiver sensor, ultrasonic sensor, servo motor driver, and motor driver. It also provides 4 programming interfaces for expanding additional sensors.
The board is equipped with LEGO-compatible mounting holes for attaching LEGO structural components.
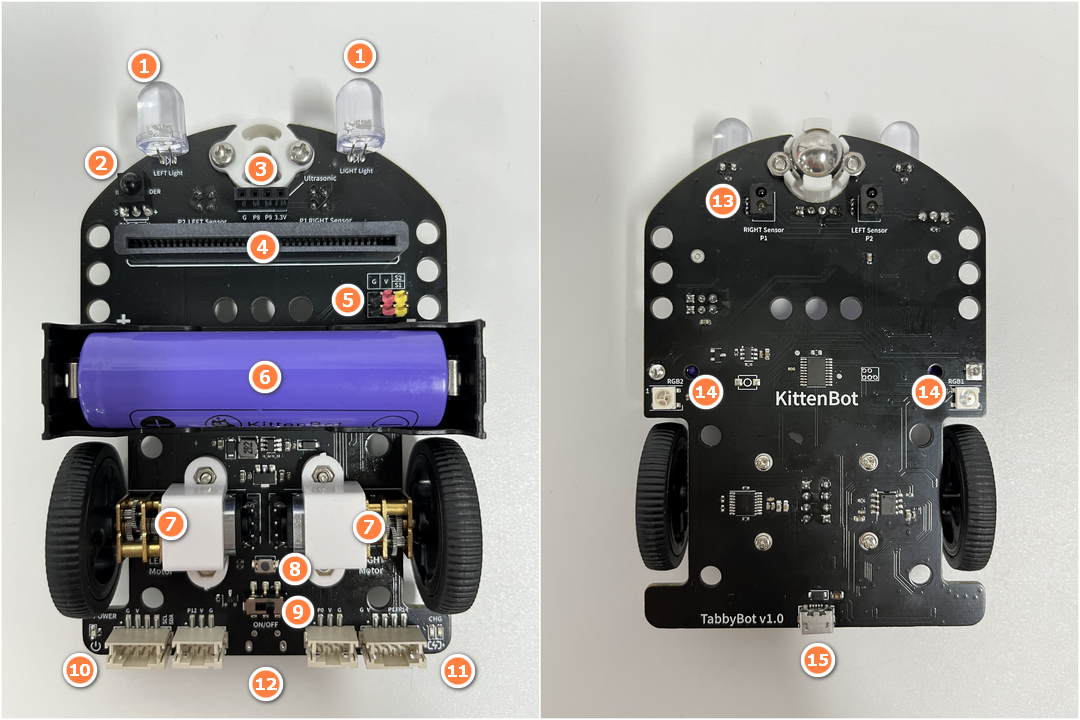
Overview:
- Front headlights x2
- Infrared receiver sensor
- Ultrasonic interface
- Microbit slot
- Servo motor interfaces S1, S2
- 18650 battery compartment
- N20 geared motors x2
- Short circuit recovery button
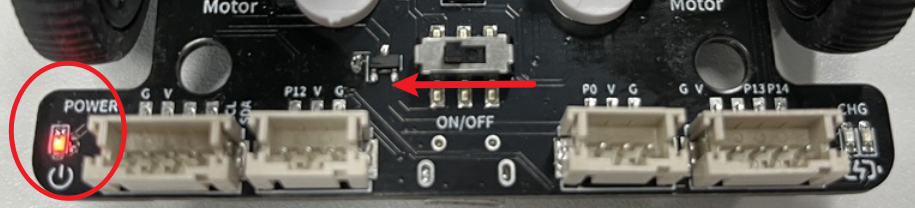
- Power switch
- Power indicator light
- Charging indicator light (blue during charging, green when fully charged)
- Expansion programming interfaces (P0, P12, I2C, and Serial Port)
- Line-following sensors x2
- WS2812 RGB LEDs x2
- USB charging interface
- The car also has 13 round holes for attaching LEGO pins.
Specifications:
| Items | Parameter |
|---|---|
| Operating voltag | 3.3-5VV |
| Charging voltage | 5V |
| dimensions | 78x120x34.5mm |
| Wheel diameter | 34mm |
| Motor speed | 250rpm (no-load) |
| Compatible mainboards | Microbit V1.5/Microbit V2.0 |
Onboard Programmable Resources:
Front headlight LED
WS2812 RGB lights
Infrared receiver
Ultrasonic distance Sensor
Two servo motor drivers
Two motor drivers
Two line-following sensors
PH2.0 3PIN interfaces x2 (P0 | P12)
PH2.0 4PIN serial port (GND 5V Rx=13, Tx=14)
PH2.0 4PIN I2C interface (GND 3.3V SCL SDA)
Charging Guidelines:
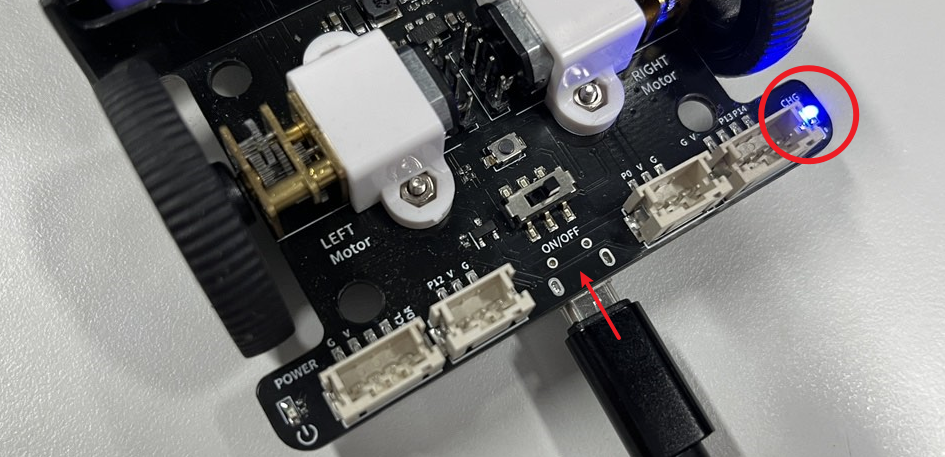
You can charge it using a computer's USB port or a mobile phone charger. The charging voltage should be 5V, and the charging current should be equal to or greater than 1A.
To charge TabbyBot, connect a MicroUSB cable to the MicroUSB port on TabbyBot. A blue light will indicate charging, and it will turn green when fully charged.
It is advised to turn off the car's power switch while charging. Charging time is around 1.5 to 2 hours. Avoid prolonged charging to prevent accidents.
Usage Guidelines:
- Remember to turn on the power when using TabbyBot to ensure accurate sensor readings.
- The USB port on TabbyBot is only for charging and program downloading.
- Pay attention to the polarity markings when installing the 18650 battery.
- Avoid prolonged motor stalling to prevent motor damage.
Quick Start:
Install the 18650 battery or remove the battery holder.
Connect the Microbit.
Use a micorusb cable to connect the Microbit to a computer.
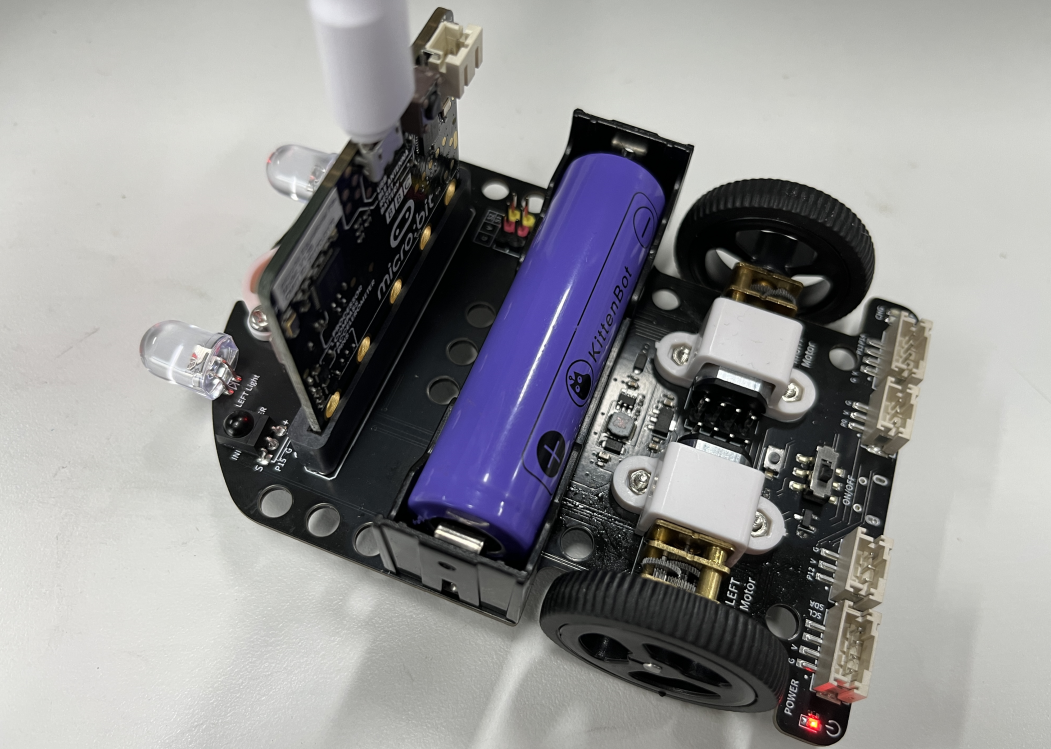
Turn on the power
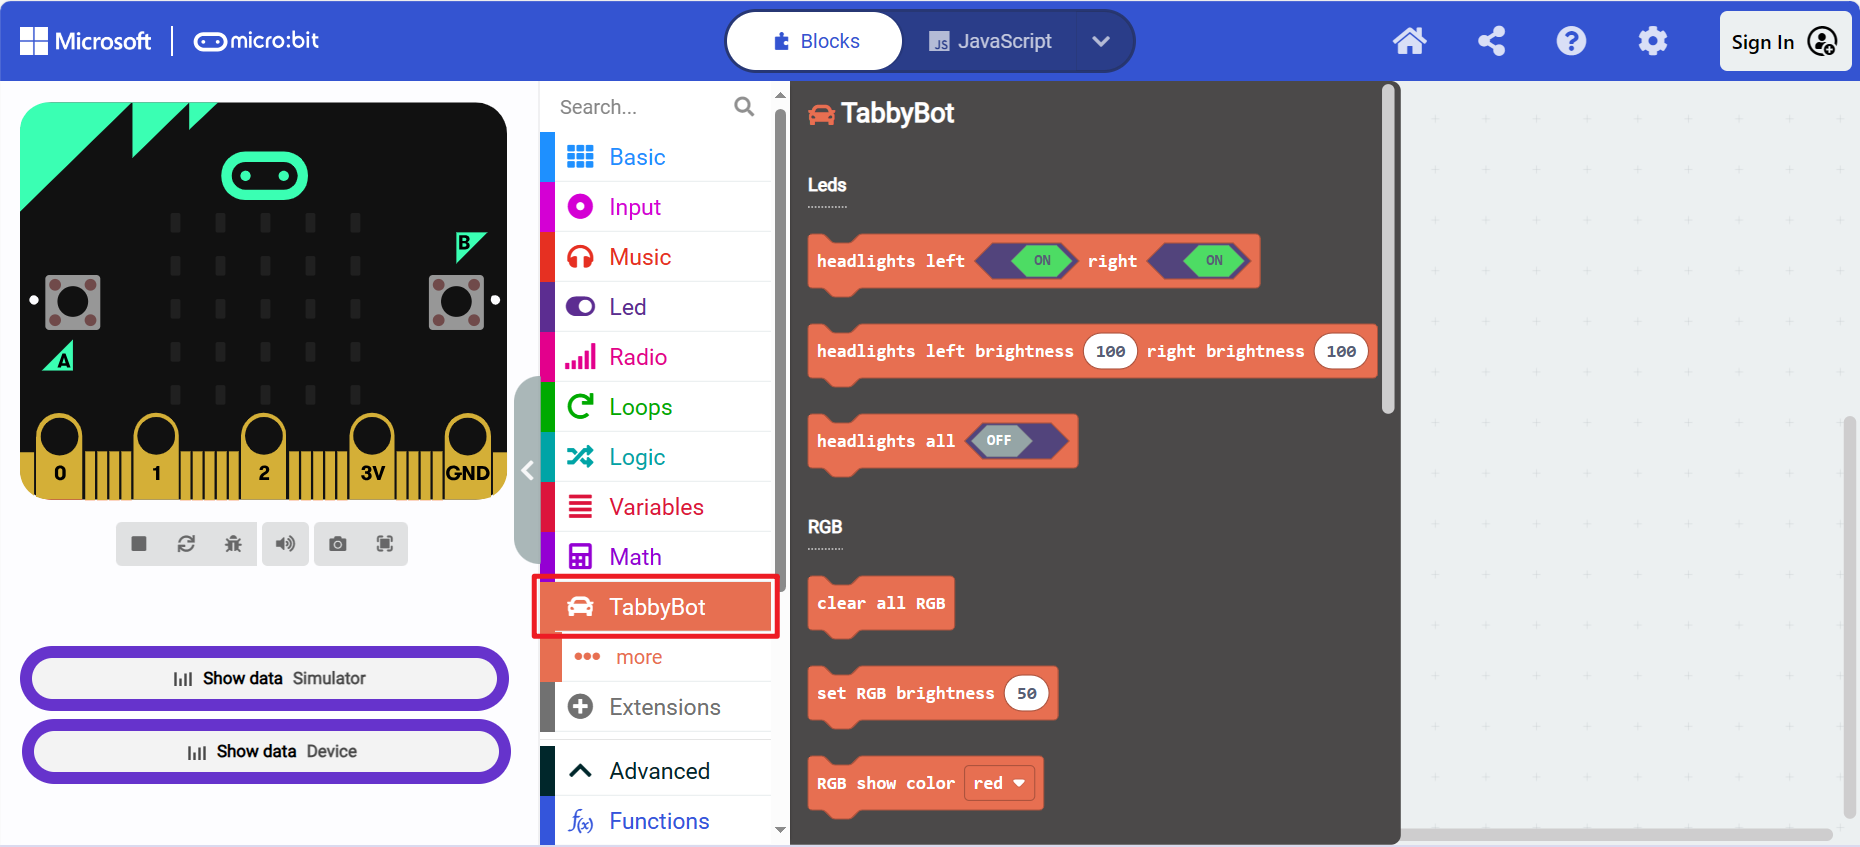
Open the MakeCode platform https://makecode.Microbit.org/
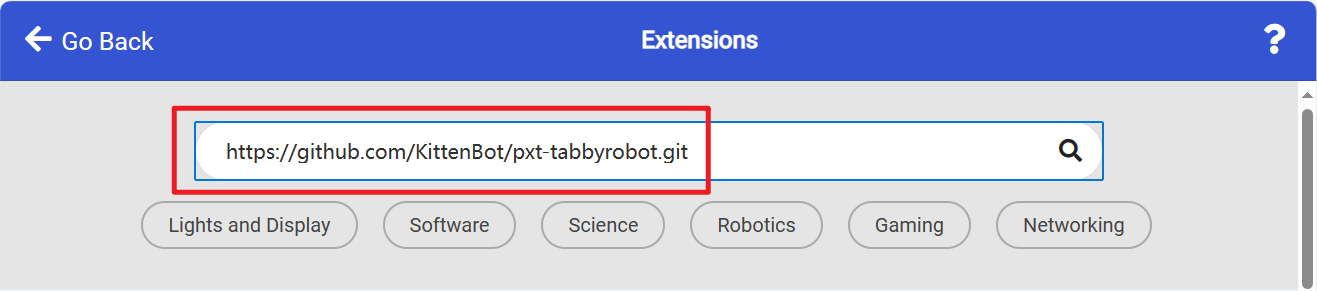
Load the Extensions: https://github.com/KittenBot/pxt-tabbyrobot.git
Start your programming journey!
Sample Program Testing:
Headlights: https://makecode.Microbit.org/_HWzAVxauKfpE
RGB: https://makecode.Microbit.org/_d4kCAH28zcob
Motors and Servos: https://makecode.Microbit.org/_doM4aUCYX12h
Line-following Car: https://makecode.Microbit.org/S67065-32045-71472-77348
Ultrasonic Obstacle Avoidance Car: https://makecode.Microbit.org/S18373-61152-77390-63144